An access profile or user role defines the page access, permissions and possible actions for a user configured with this role.
By default, HEFLO has three types of native user roles: “Administrator”, “User” and “Portal only”. In this article, we will explain the difference between these roles, show how to create and edit roles, and finally, how to assign one or more roles to a user.
Menus by user role
One of the main differences between these default roles is the permission to edit processes. Also, additional pages are only available for the “Administrator” role.
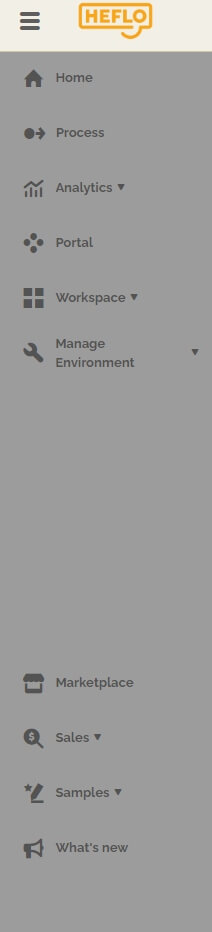
Below is a typical menu available to a user with the “Administrator” role:
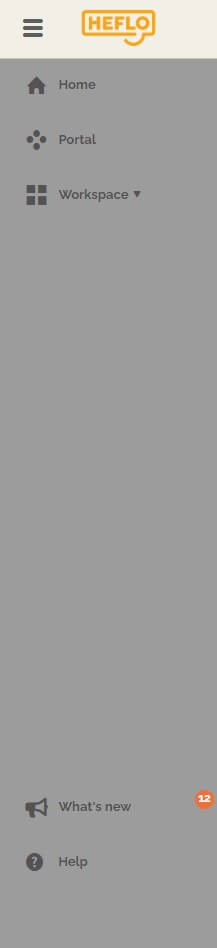
Below is the menu available for a user with the “User” role:
And below is the menu available for a user with the “Portal only” role.
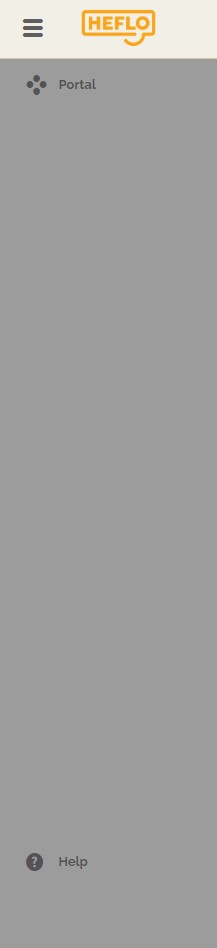
Important: People in this role do not need a named or concurrent license to access the process portal.
To find out more about the types of licenses: Licenses on HEFLO.
HEFLO allows users of paid plans to create custom roles.
Role management
HEFLO natively provides 3 roles: “Administrator”, “User” and “Portal only”.
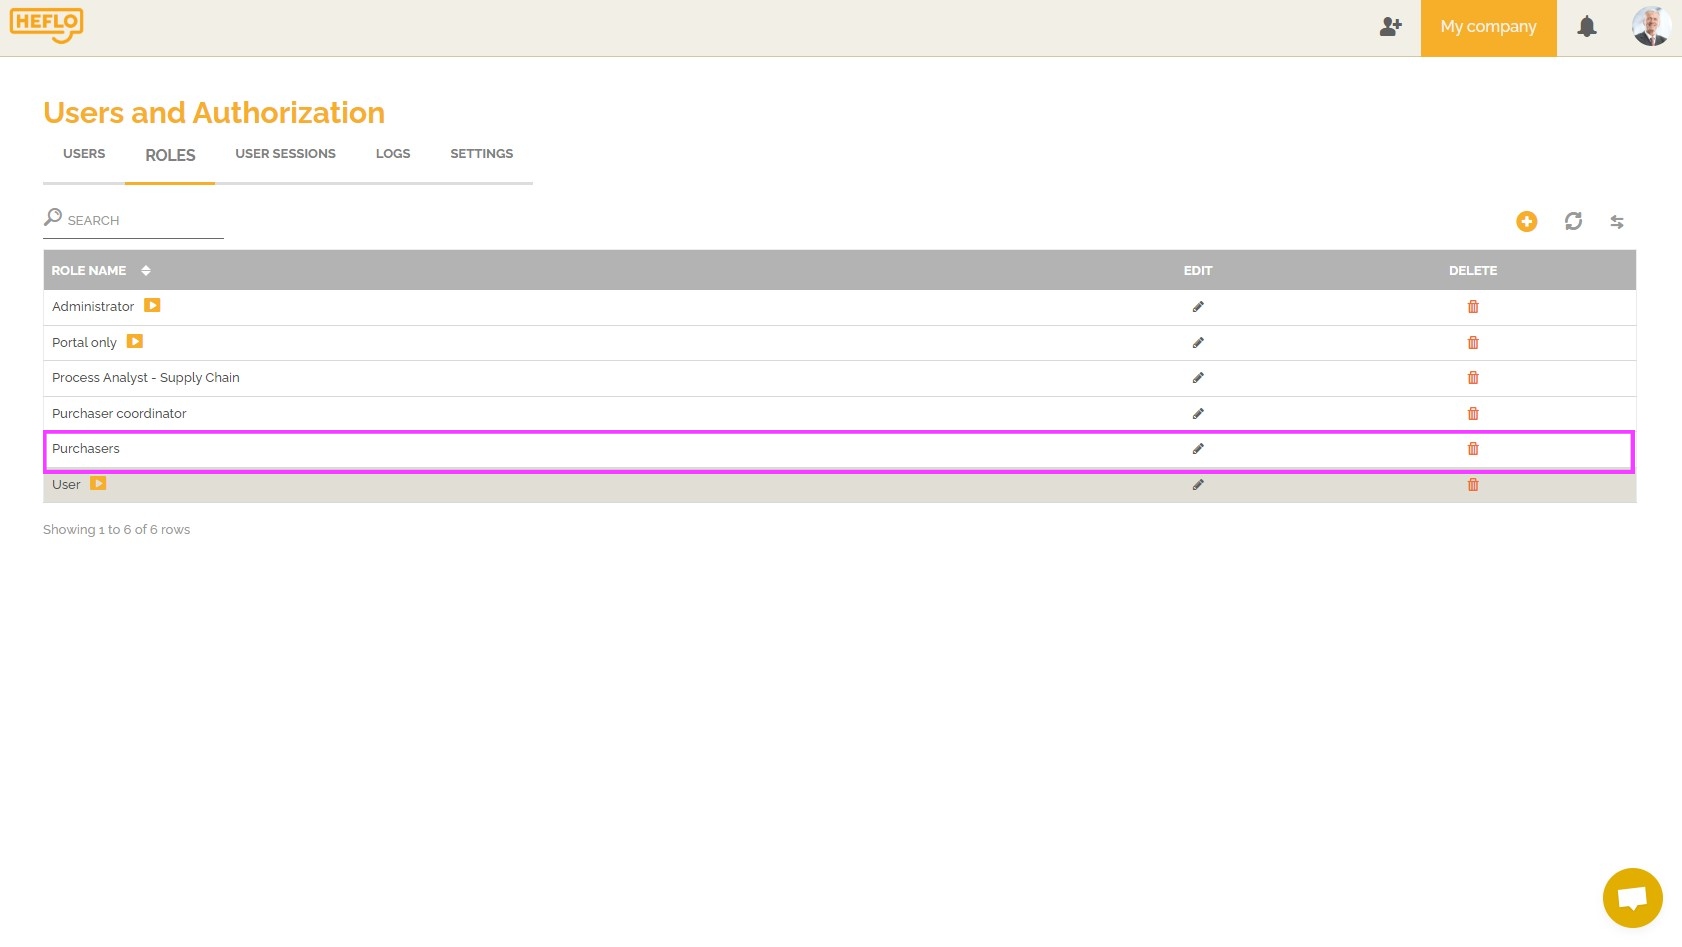
You can find these roles in the “Manage Environment” section, in the “Users and Authorization” page and in the “Roles” tab.
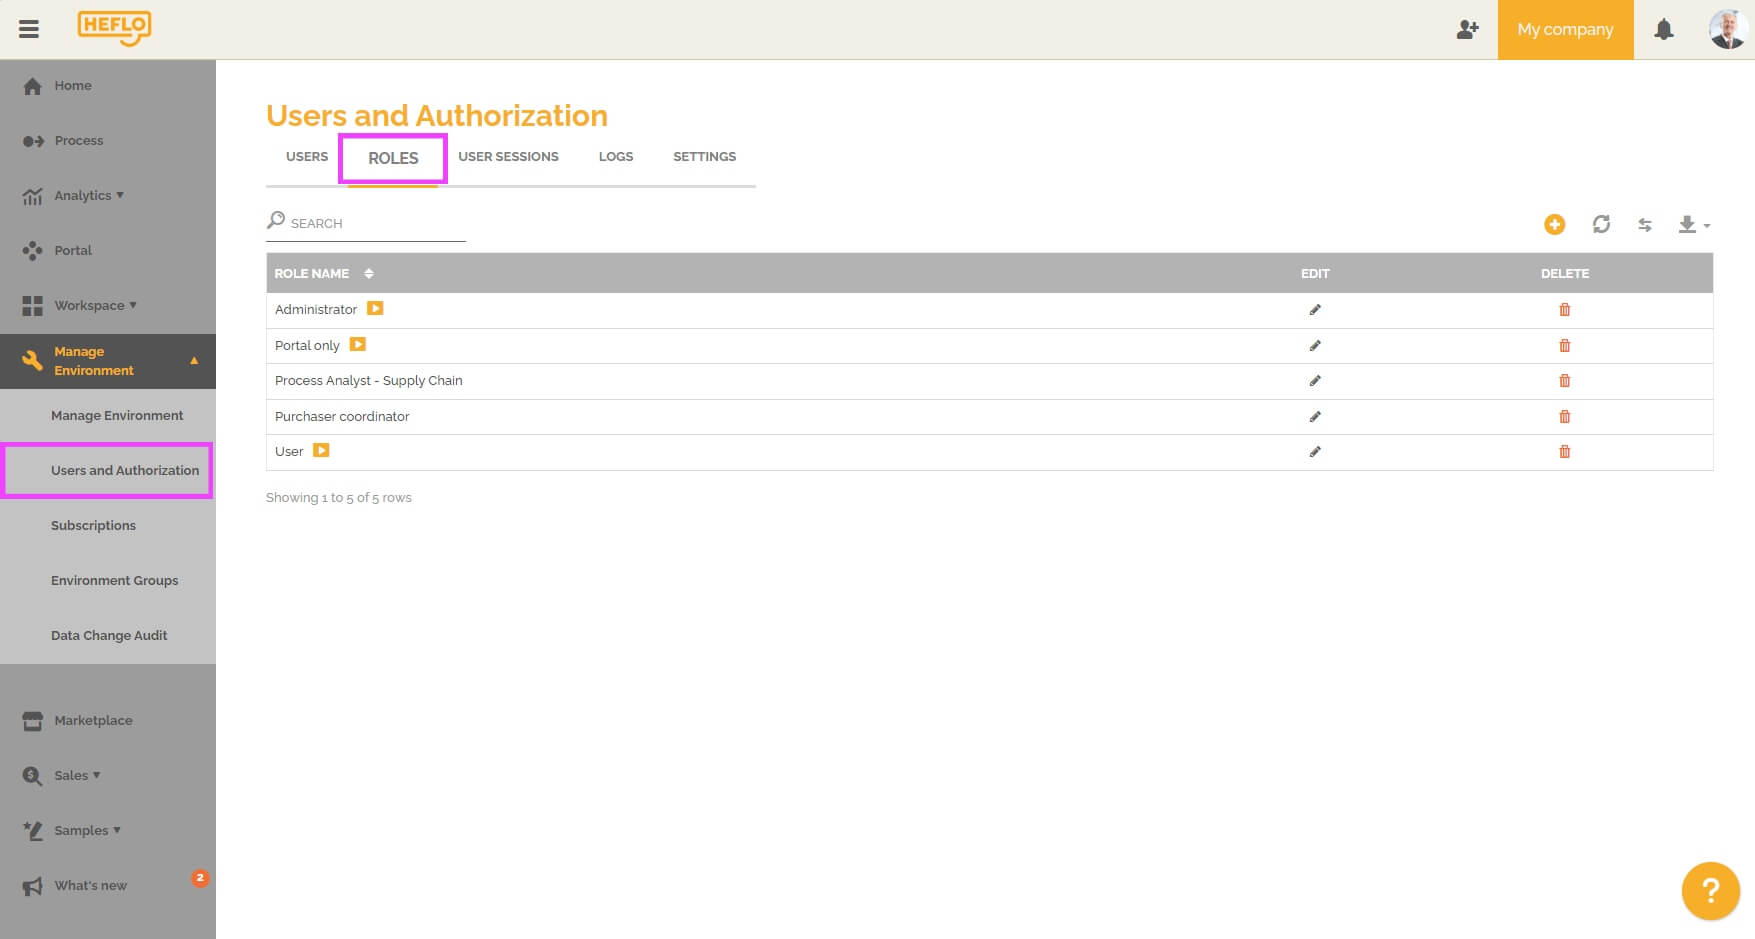
Click the pencil icon to see the properties of a role:
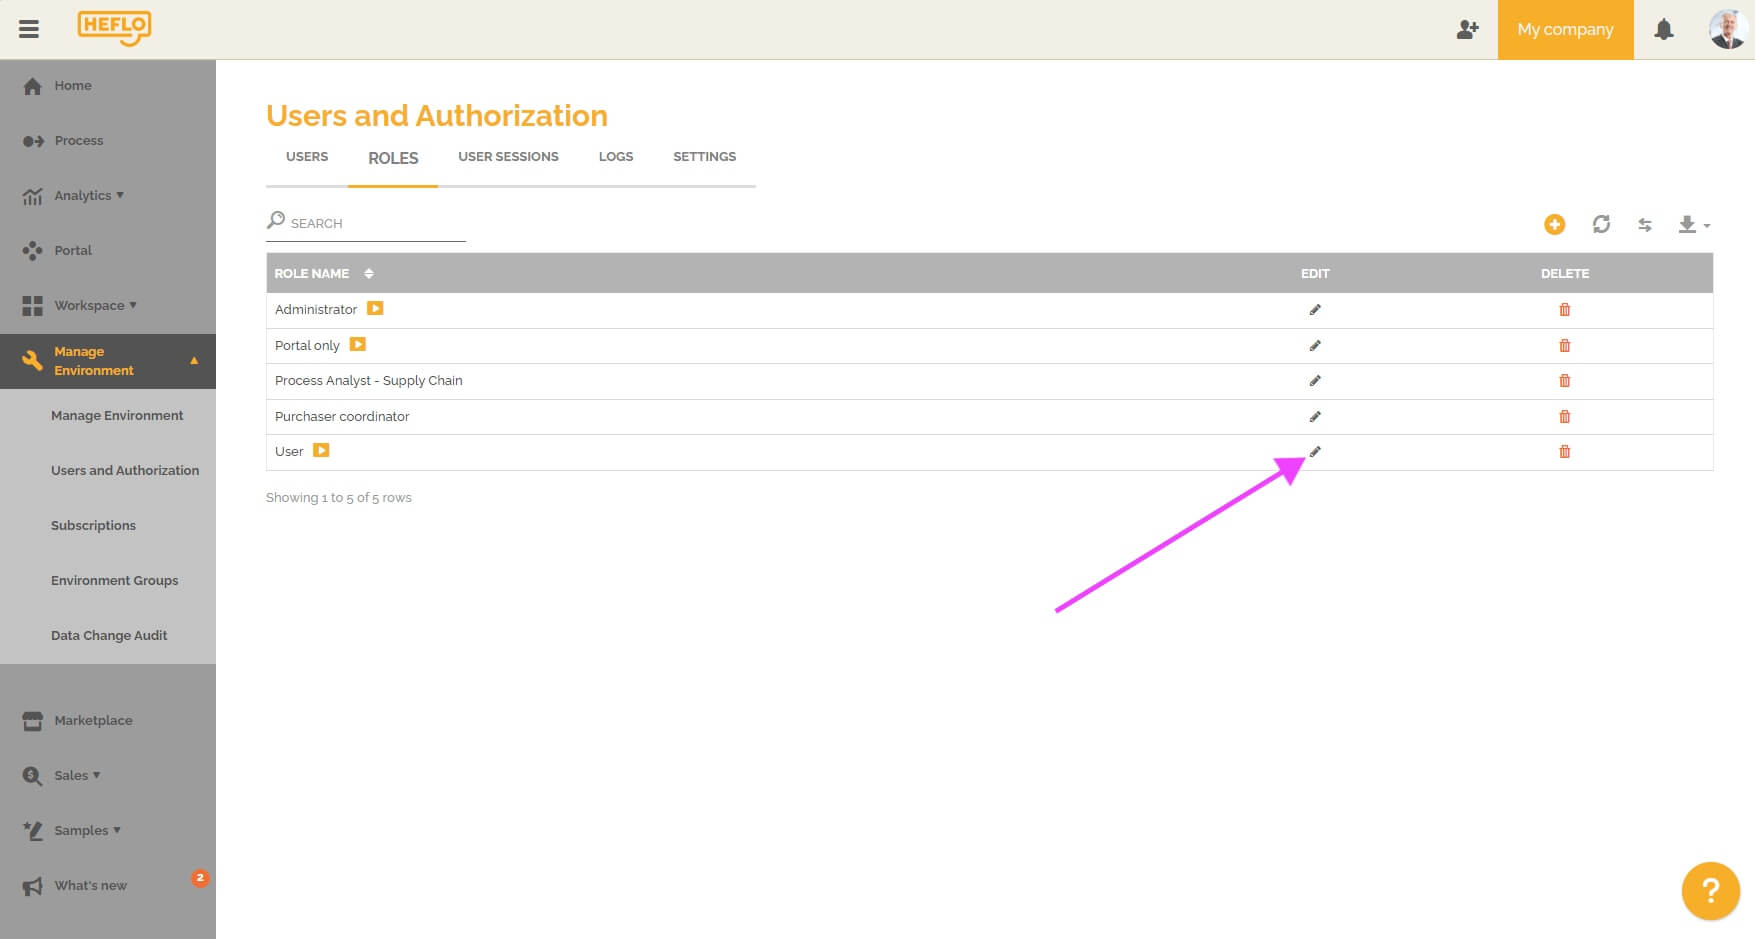
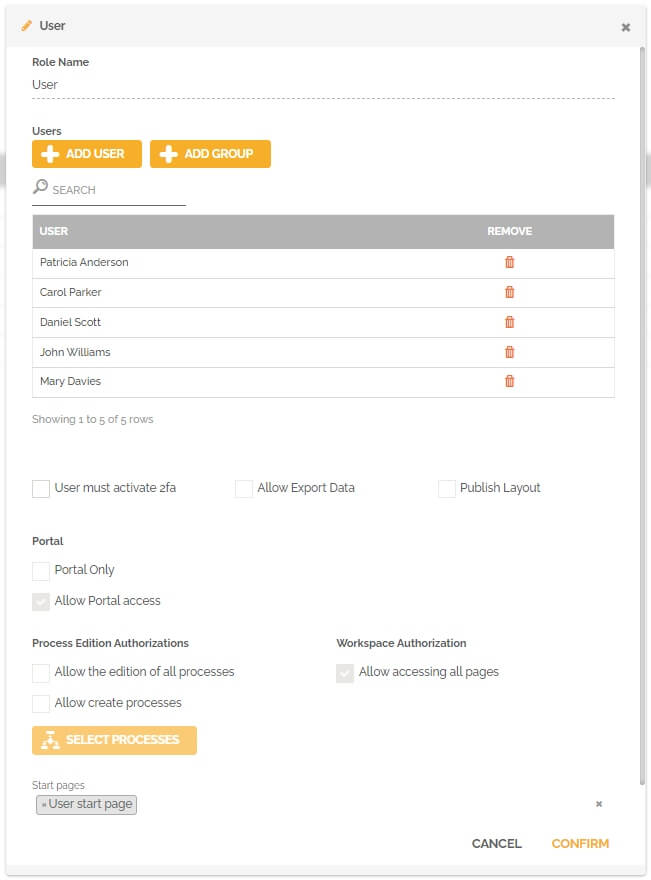
On this screen you will see the permissions for this role regarding possible actions and accessible pages.
Regarding the 3 native roles, you can only change a few options:
- The use of two-factor authentication. To learn more about this feature: Tutorial : Two Factor Authentication.
- The ability to export the database linked to this environment. To learn more about this feature: Tutorial : Data Export.
- Add one or more home pages (feature not available for the role: “portal only”).
You can also associate a list of users with this role by clicking on the “Add user” button.
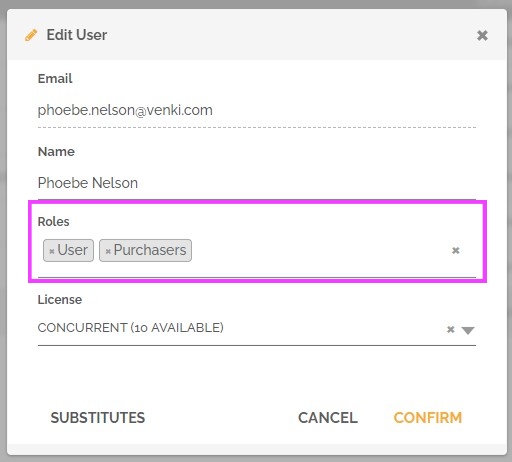
There is another method to associate a role with a user. You must edit the concerned user on the “Users” tab by clicking on the pencil icon in the row of the concerned user.

Creating a role
To create a role, just click on the “+” icon in the “Roles” tab.

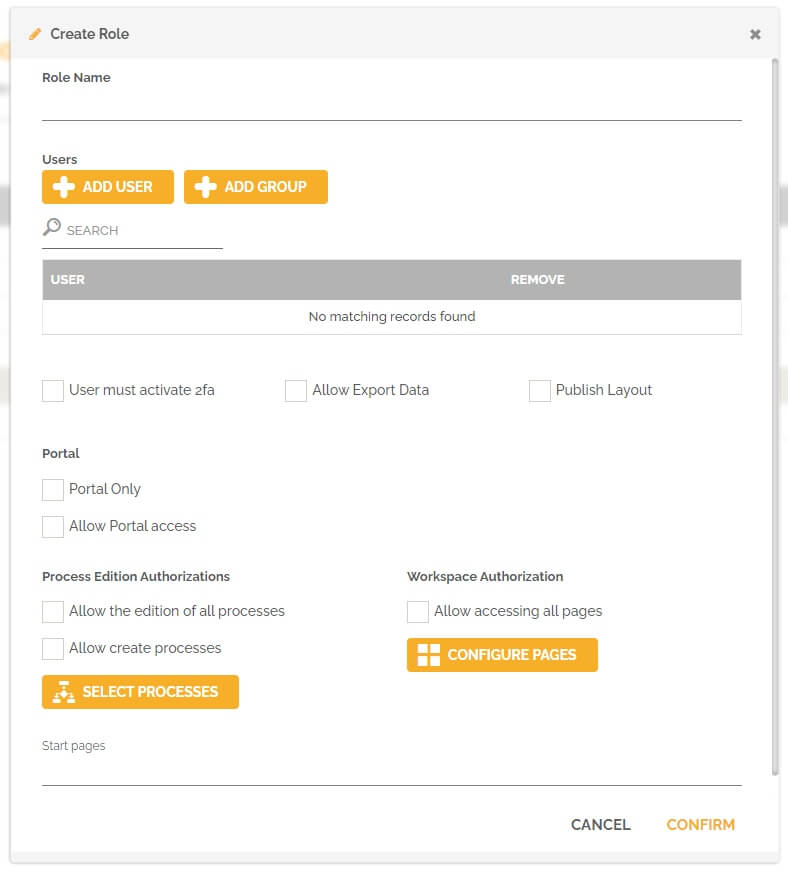
From this moment, you must fill in information to define this role:
Role name: This will be the textual representation of this role, which you will find in the creation or edition of a user.
Add user: This is an optional step, you can use this method to associate one or more users to this role.
Add group: This is a contractual option to allow associating a group of users configured in your SSO to a HEFLO role. You can contact our sales team to find out more about this feature.
User must activate 2 FA: Learn more about this feature: Tutorial : Two Factor Authentication.
Allow Export Data: This option gives the possibility to export the database linked to this environment. To learn more about this feature: Tutorial : Data Export.
Portal: You have the option to allow access to this screen or not, and even to only allow access to the process portal screen. This role will then be very similar to the role: “Portal only” but with the possibility of selecting a list of the processes concerned. We will see this later in this article.
Workspace Authorization: You can authorize access to different pages in the workspace. If you want to give access to all the pages, then click on: “Allow accessing all pages”. If you wish to make a selection of pages and choose the level of action possible on these pages, then click on: “Configure pages”.

You will then be able to restrict access to the different pages that exist in your environment. These can be native pages such as: the tasks list, departments or people. But you will also find here the pages that were created in this environment.
If you select: “View and edit” the user associated with this role will then be able to access the page and update data. He can for example add a new department in the “Departments” page. However, he will not be able to add new properties and configure the widgets and dashboards of this page. If you want him to be able to do this, you will then have to click on: “Configure”.
Process Edition Authorizations: You can allow the user to access the process editor to create processes or edit processes or even both.
Select processes: This screen allows you to make a composition of possible actions for this role on the different existing processes in this environment. You then have the possibility to create custom roles for a list of processes with actions targeted on the screens: process editor, process portal and on the workspace.
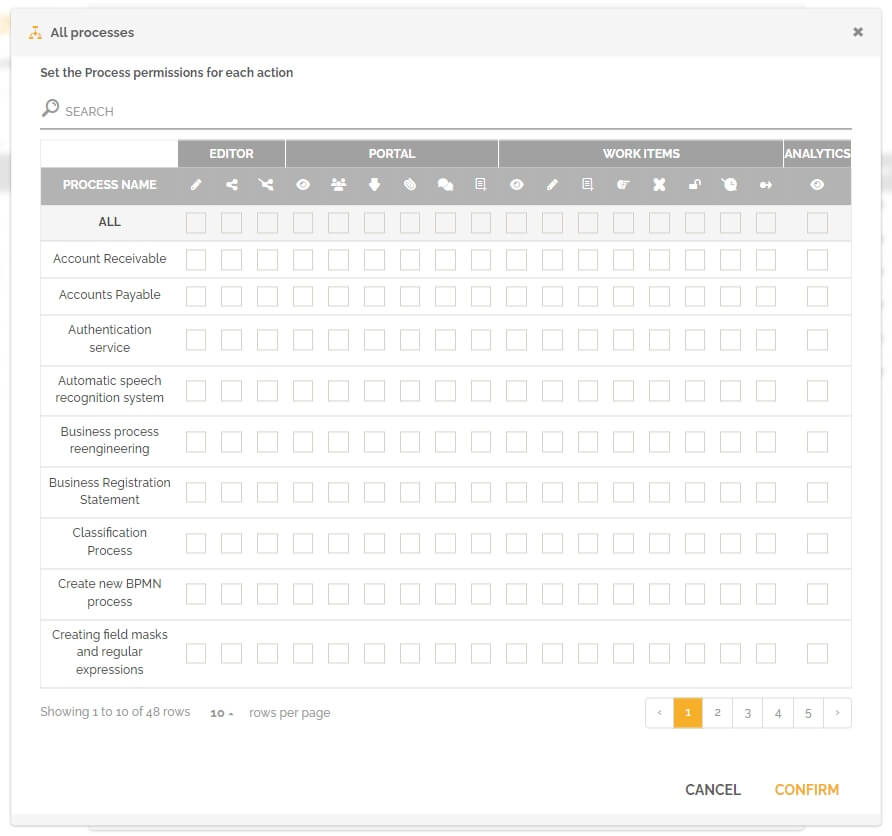
To learn more about this configuration: Configure process authorization.
When you have finished filling in the information for this role, you just need to click on “confirm” to create this role.

If during the creation of the role, you did not associate a user, you can then go to the “Users” tab and edit a user.
You can modify the role association by replacing an existing role, or by making a composition of different roles. This will allow this user to have access to all the pages and processes defined in all the roles assigned to him.