
Business processes often remain pending at a specific task under someone’s responsibility. This may delay the process to be finished on its due time.
To avoid this scenario and to add more intelligence to the process, you can have a process with an automatically escalated activity using a timer boundary event to trigger some specific actions after a given period of time.
Step 1 – Including a timer boundary event
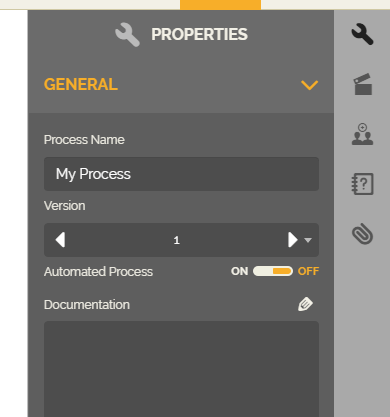
Before including the timer boundary event, make sure the process has the automation feature activated. So, go to the properties tab and activate the switch “Automated Process”.
For demonstration purposes, we will use a simple Support process, with lanes for the first and second service levels.
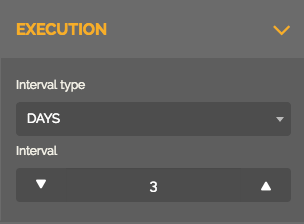
- We will configure the escalation from activity “Analyzing and Solving the demand”, first level, to activity “Analyzing and Solving the demand”, second level support, in case it remains in the first activity for more than 3 days.

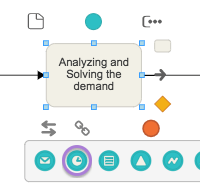
- To add the boundary event element, select the task “Analyzing and Solving the demand”.
- Click the chain icon; A list containing different kinds of boundary events will appear and add the intermediate timer.
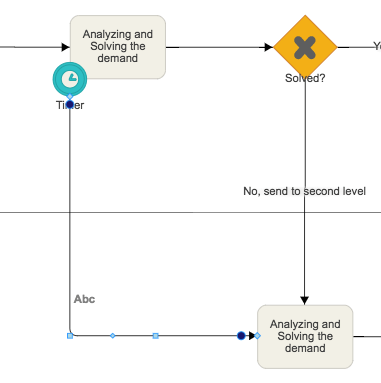
- Pull the timer sequence flow to the activity “Analyzing and Solving the demand” of the second lane.
Step 2 – Configuring parameters
The next step is to configure the timer boundary event parameters.
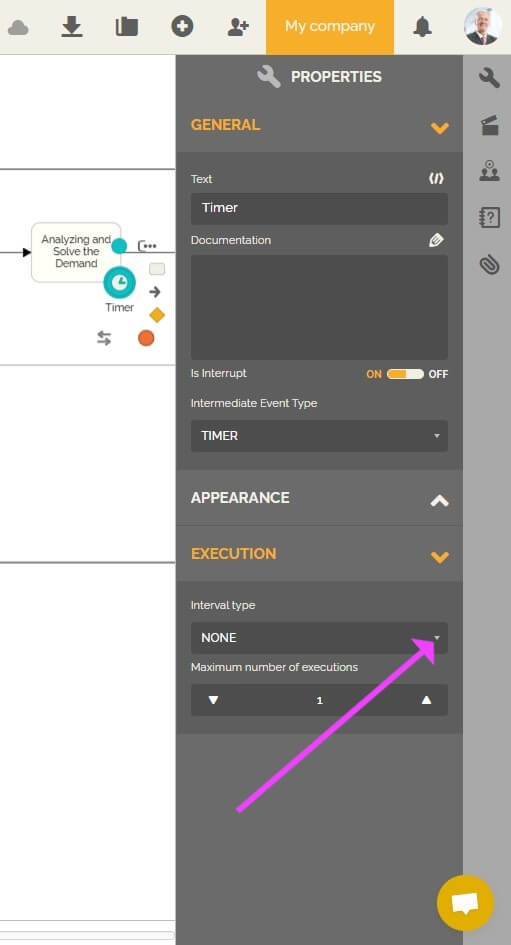
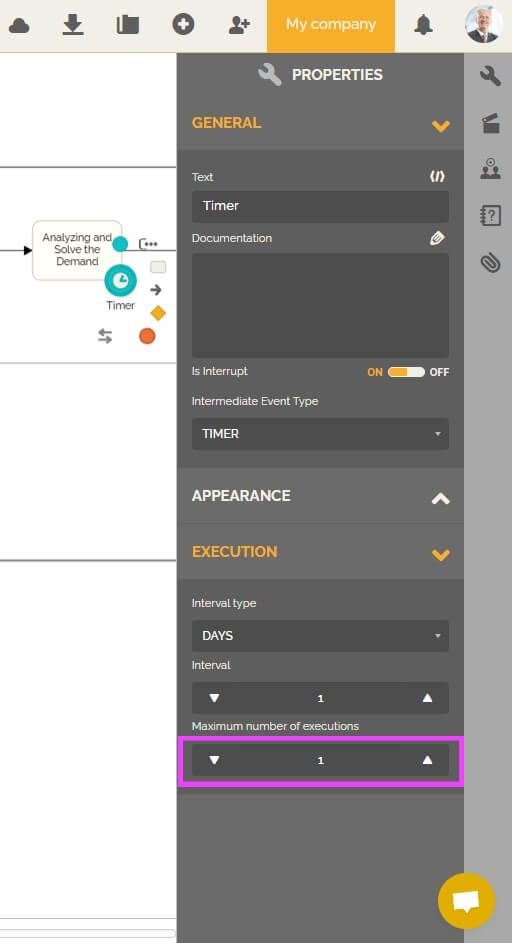
- Select the timer boundary event and go to the properties tab on the right.
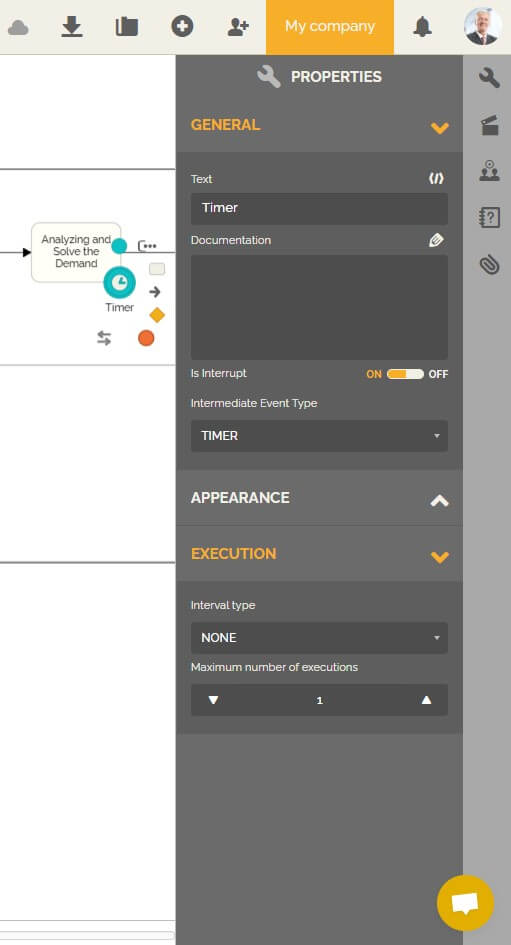
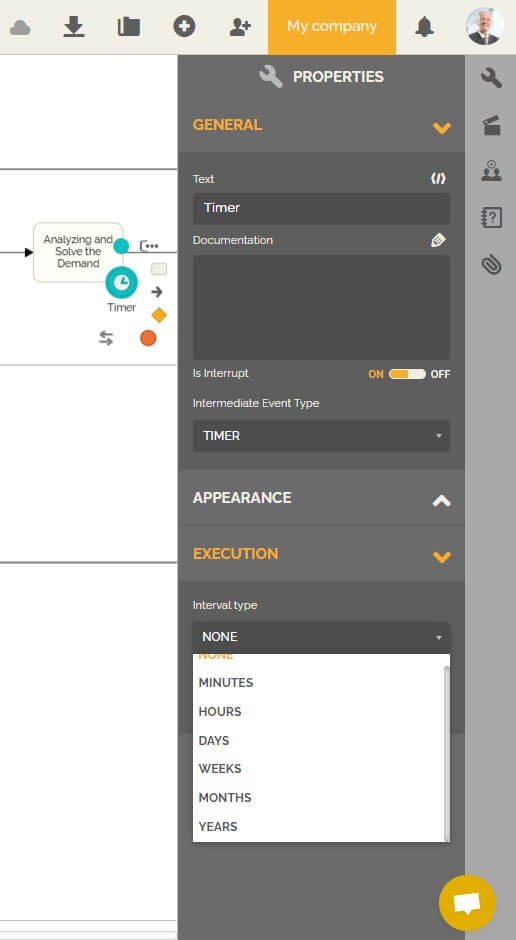
- In the “Execution” part, then the “Interval type” section select the unit of time that will be used to count time in your boundary event.
- Upon selecting an interval type, the “Interval” section will appear, it is the field in which you need to define the exact time that HEFLO will count to execute the next action.
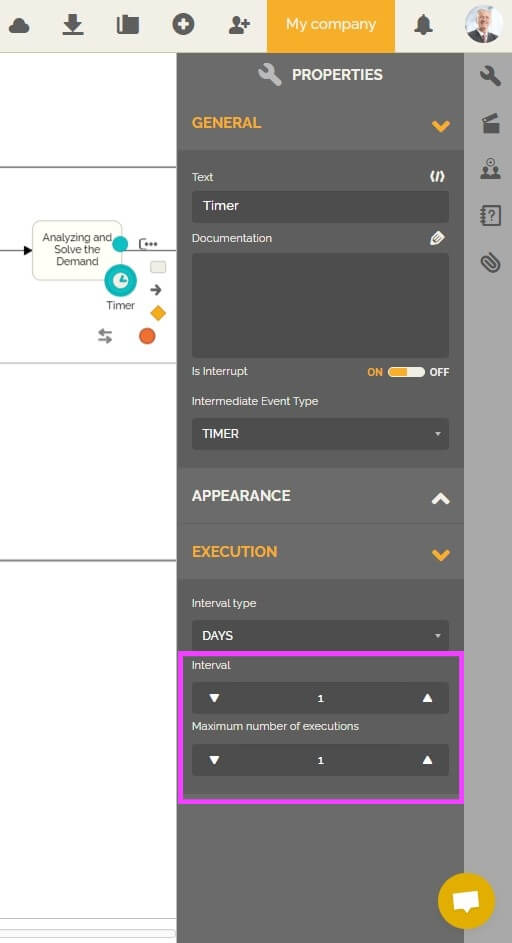
In the “Maximum number of executions” field choose a number from 1-100. This makes it possible to determine an execution limit in case that this intermediate time event is used to create a loop to send an email, for example, to remind the task responsible that an action is pending on his part.
In our example the maximum number of executions does not matter because the workflow will follow this path only if the interval is exceeded, and that only once.
To learn more about this functionality: Maximum number of executions of an event.
Step 3 – Testing
Tests are performed within the process editor itself.
For the test, we will leave the parameters with shorter deadlines so that we can follow the escalation.
- Change the “Interval type” to “Minutes” and the “Interval” to “5”, and the “Maximum number of executions” to “1”.

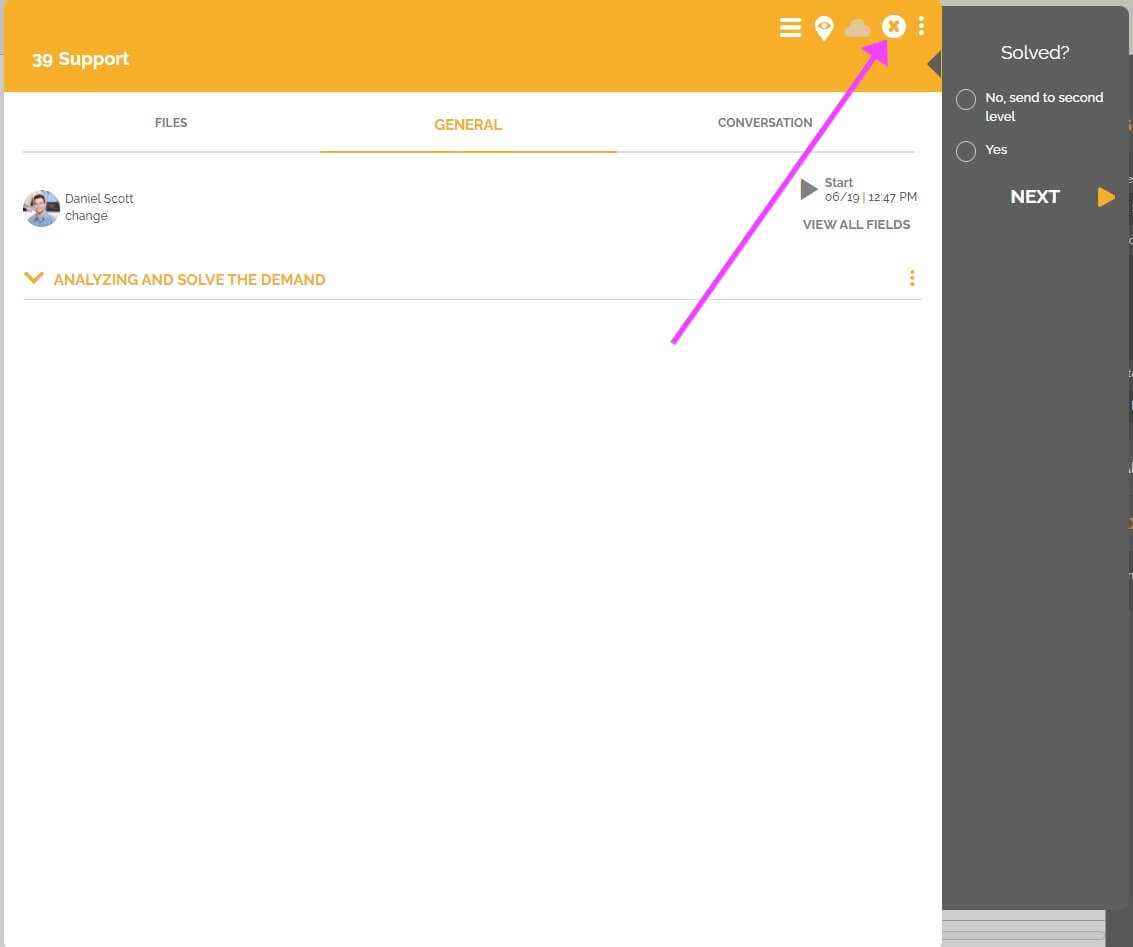
- Click on this icon to save changes:

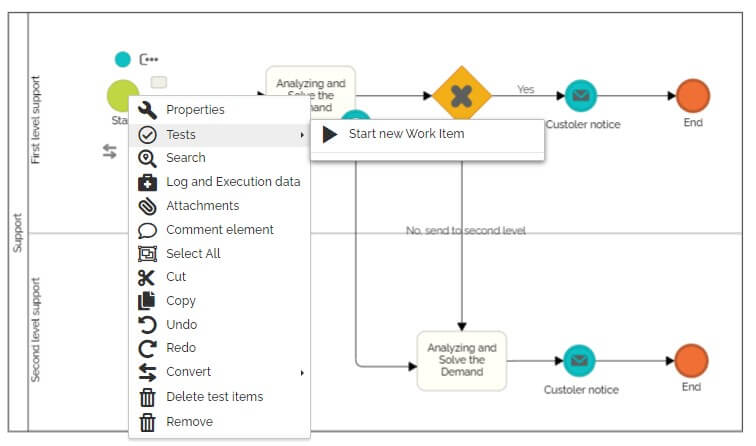
- Select the process initiator and right-click it, then click “Tests”, and finally “Start new Work Item” (for HEFLO, a “work item” is a process instance).
- In the work item execution dialog box, proceed your test till you reach the task “ Analyzing and Solving the demand”, click to close and wait for the 5 minutes configured in the timer boundary event.
- Reopen the test work item.
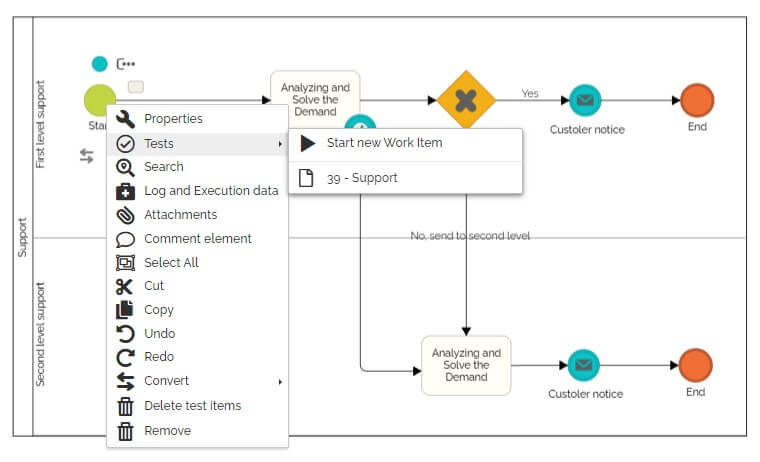
- Notice that the process was directed to the second level of support. You can also right click on the timer boundary event and then on “Force” to directly test your process without having to wait for configured timeout.
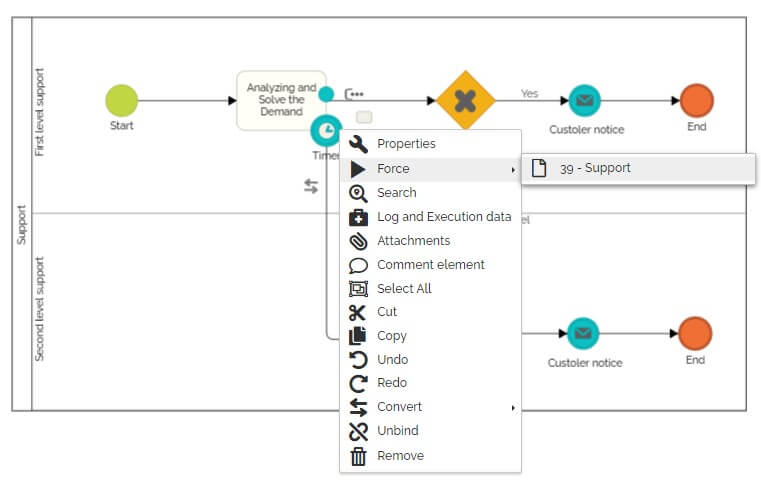
To learn more about this functionality: Force the execution of a timer and conditional type event.
Step 4 – Publishing automation
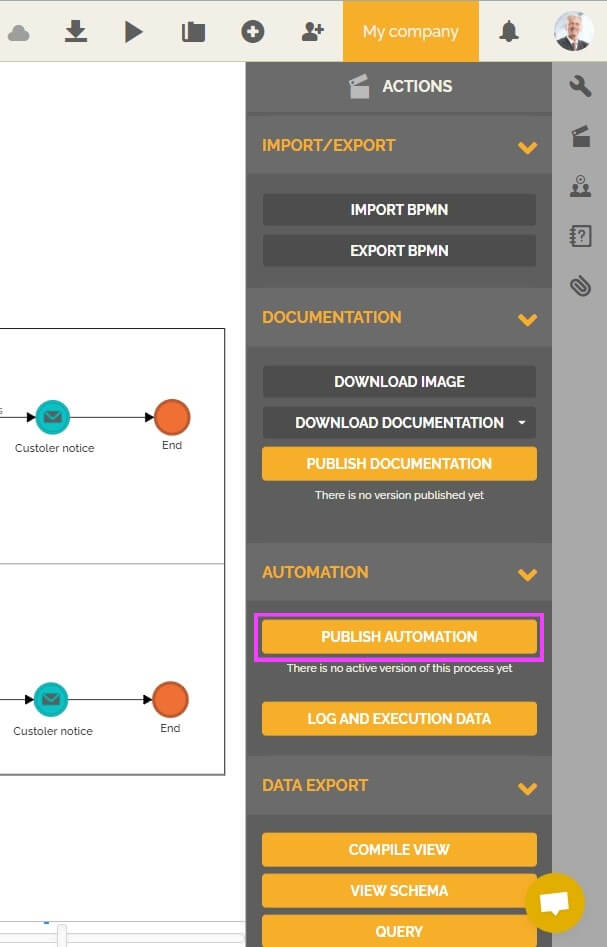
After completing all the tests, publish the process:
- Review all timers configuration to validate the configured interval.
- Select the actions tab on the right in the process editor.
- Click “Publish Automation”.
The process engine is responsible for identifying the correct timing for opening and running processes instances with automatic initiators and events such as timers.