
In this article we will show how to associate a DocuSign account with your HEFLO environment.
Configure DocuSign integration
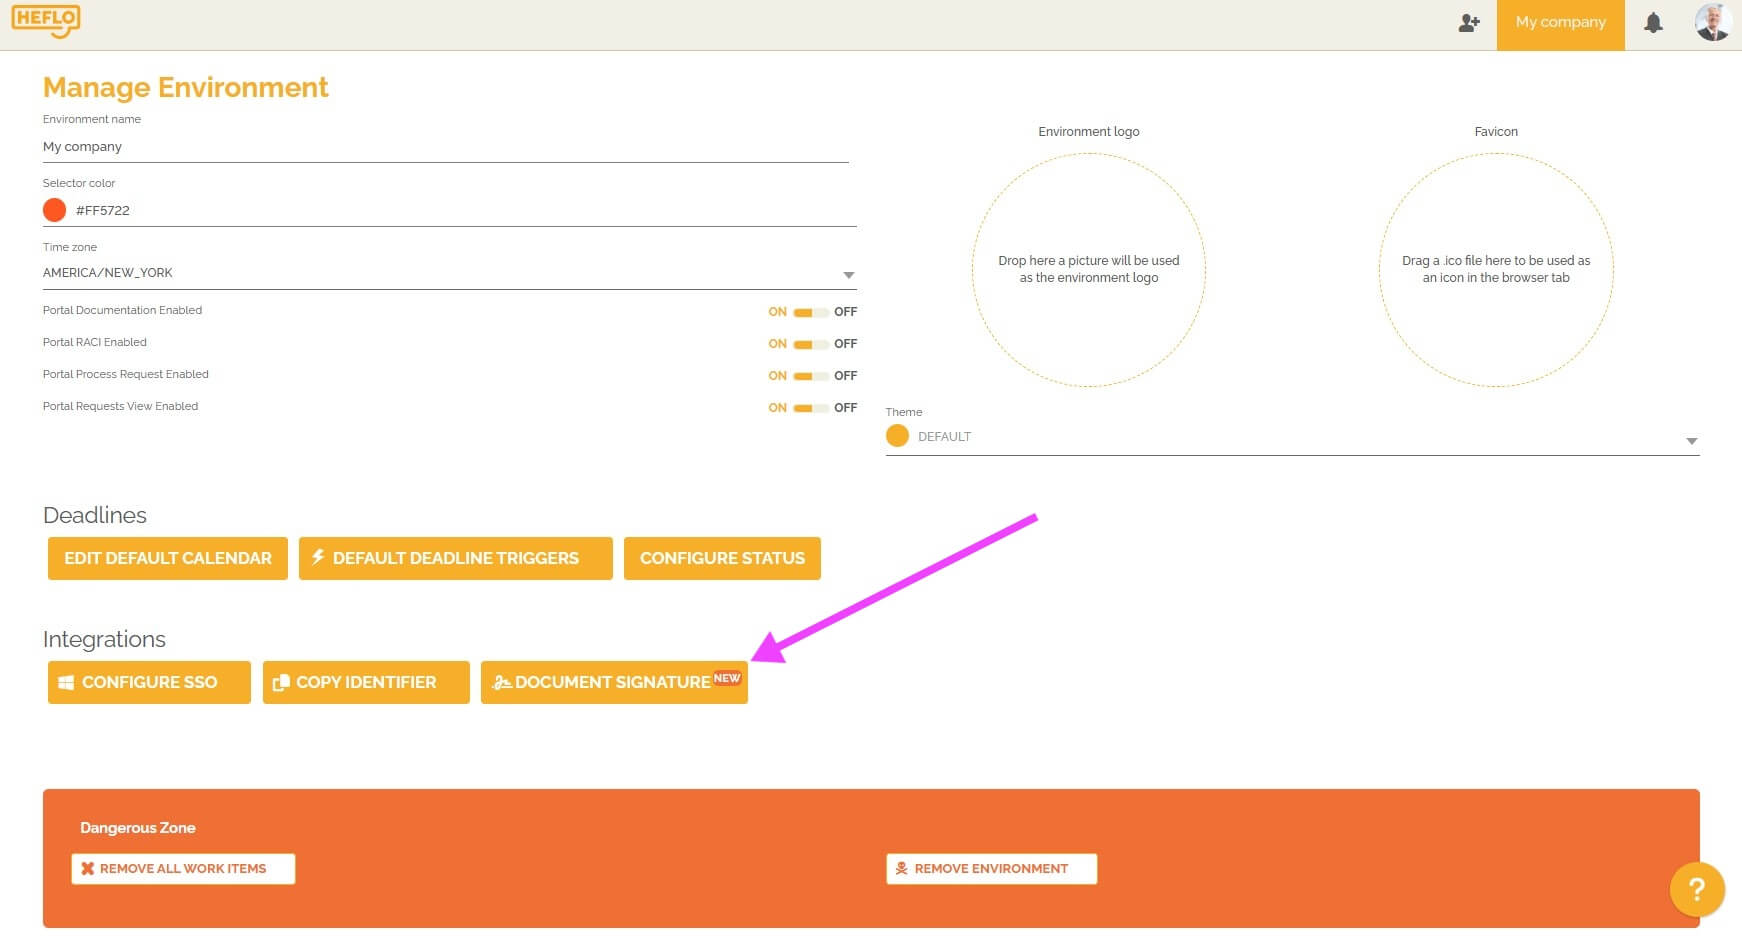
- Go to the page: “Manage Environment”.
- Click on the button: “Document signature”.
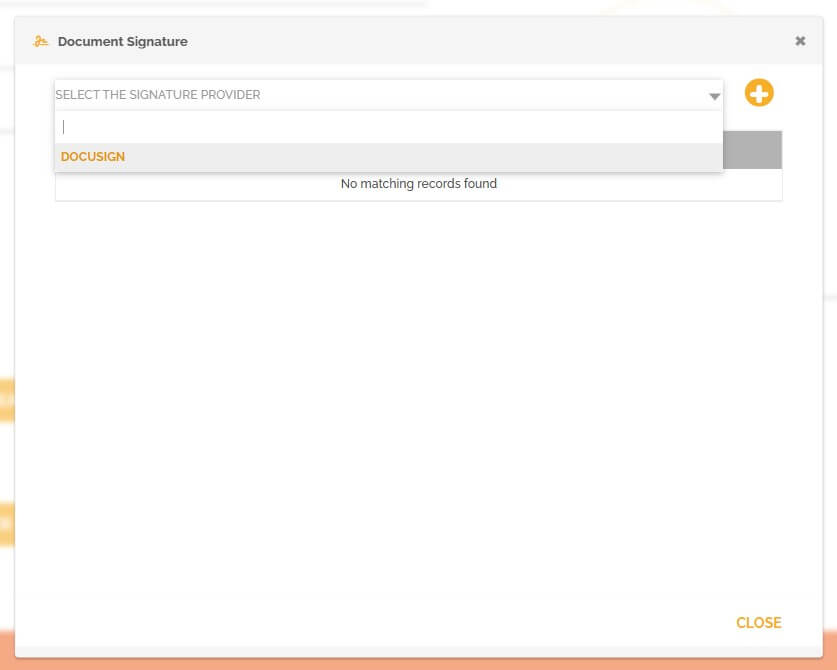
- Choose “DocuSign” in the signature provider selector.

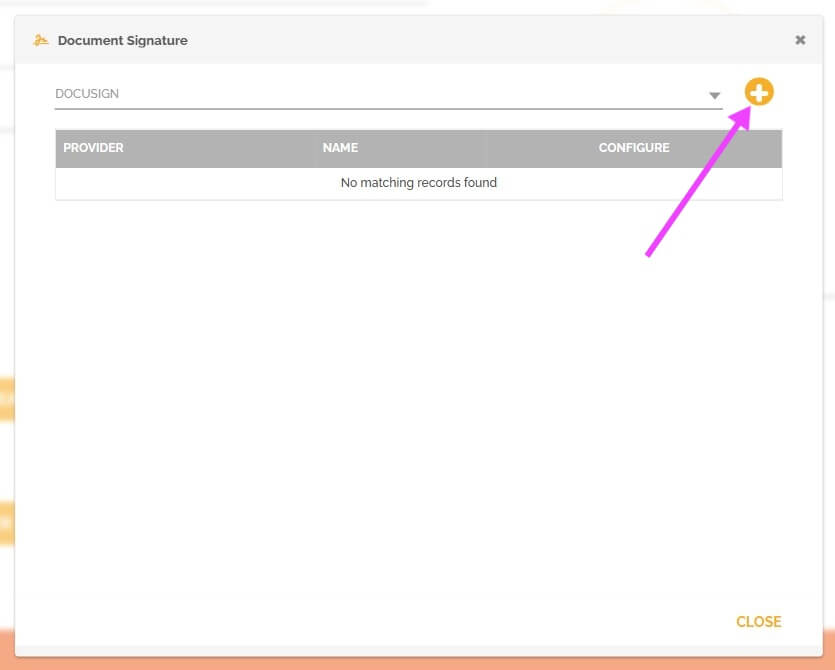
- Then click on the “+” button.
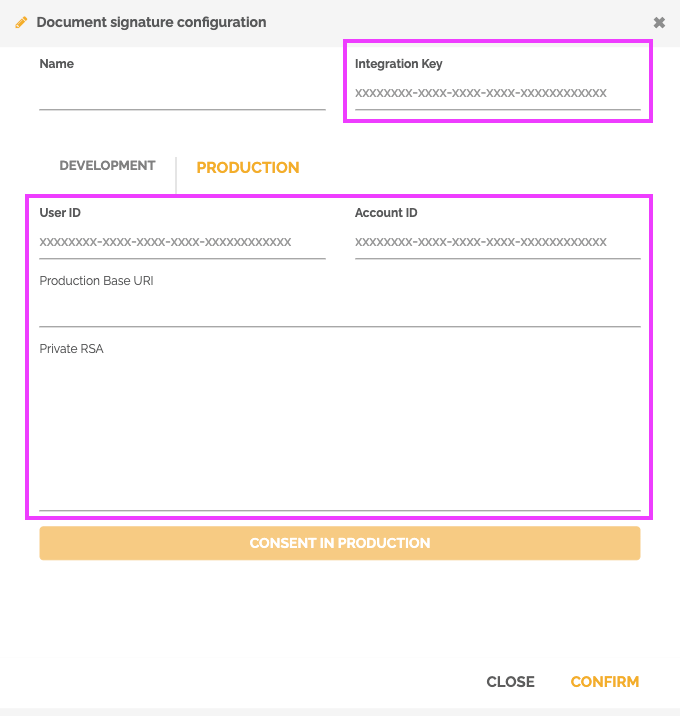
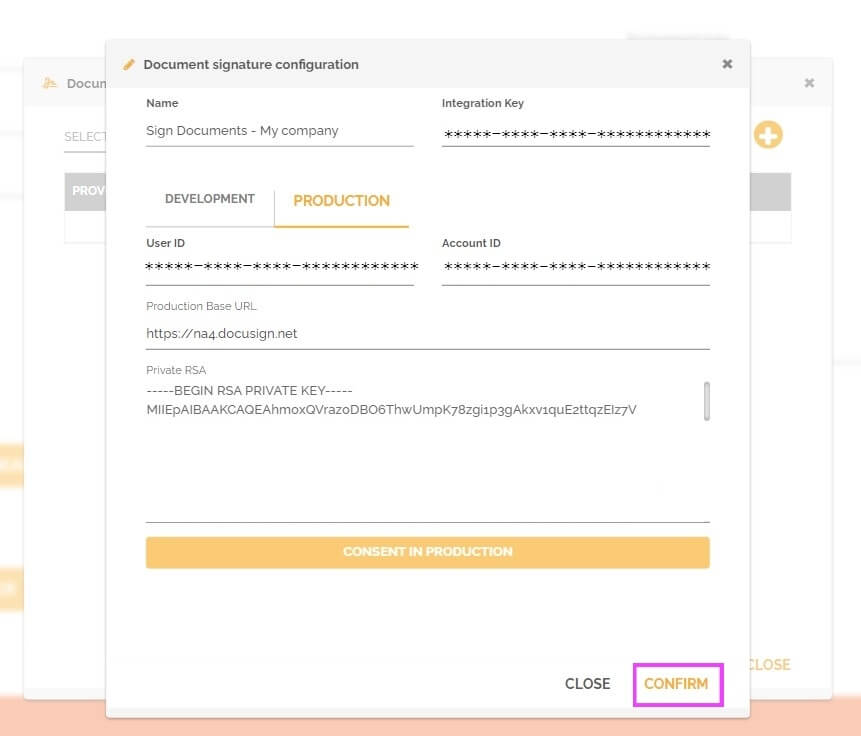
You must then provide various information. - Give this configuration a name.

- You must then enter information on two tabs: “Development” and “Production”.
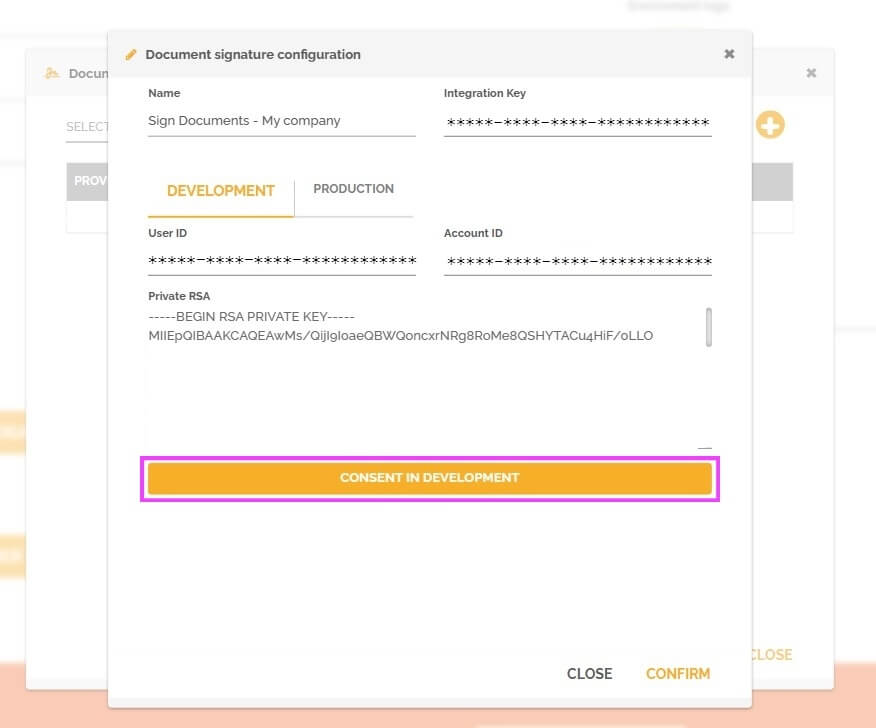
- The information on the “Development” tab is necessary to configure the integration and create test work items. You must have a “Developer” account on DocuSign to do this integration. To create a “Developer” account, access the page: https://developers.docusign.com/platform/account/ from your DocuSign account. You must then enter the integration key, your user ID and the ID of your “Developer” account. You must also enter the private RSA of your integration key. We will see how to obtain this information later in this article.
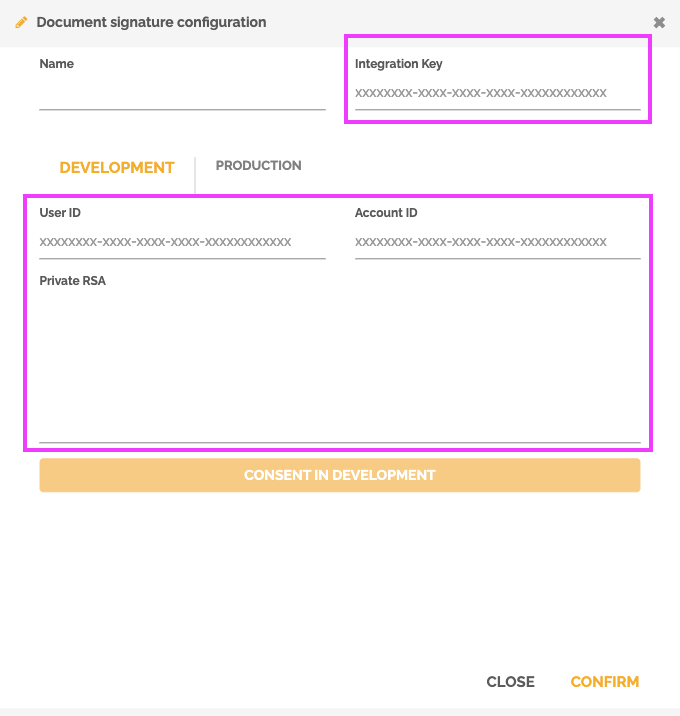
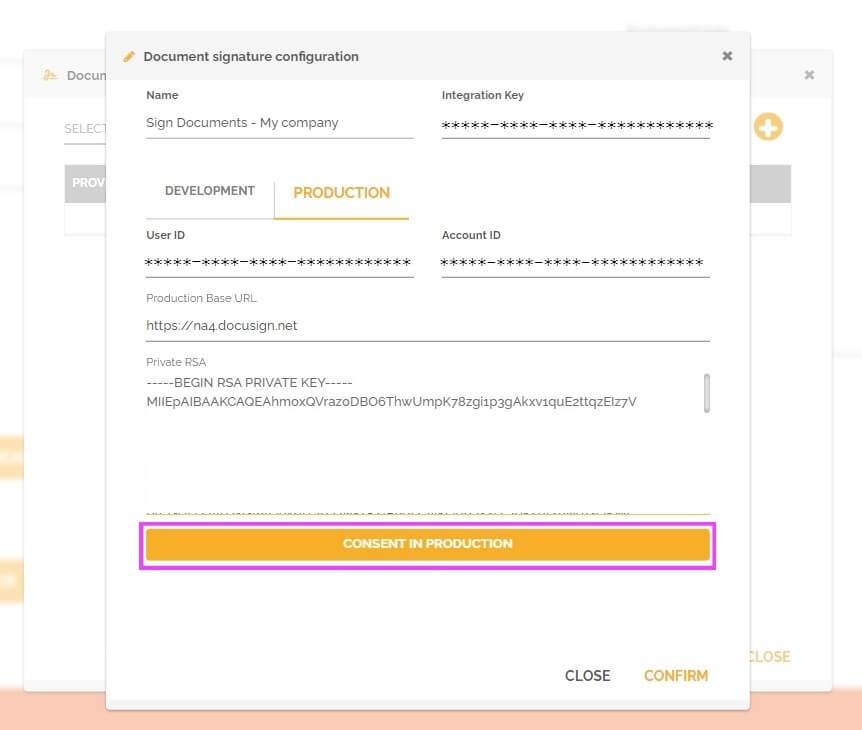
For information: The developer account is free with no limit on creating and sending envelopes. - Information on the Production tab is necessary to configure and create production work items. You will find in your account: https://account.docusign.com/ the information to populate the user ID, account ID, production base URL and private RSA. The integration key is the same as that entered in the “Development” tab. We will see how to obtain this information later in this article.
- The information on the “Development” tab is necessary to configure the integration and create test work items. You must have a “Developer” account on DocuSign to do this integration. To create a “Developer” account, access the page: https://developers.docusign.com/platform/account/ from your DocuSign account. You must then enter the integration key, your user ID and the ID of your “Developer” account. You must also enter the private RSA of your integration key. We will see how to obtain this information later in this article.
- Once the information has been entered, you must click on the “Consent in Development” button in the “Development” tab and on the “Consent in Production” button in the “Production” tab to validate this configuration.

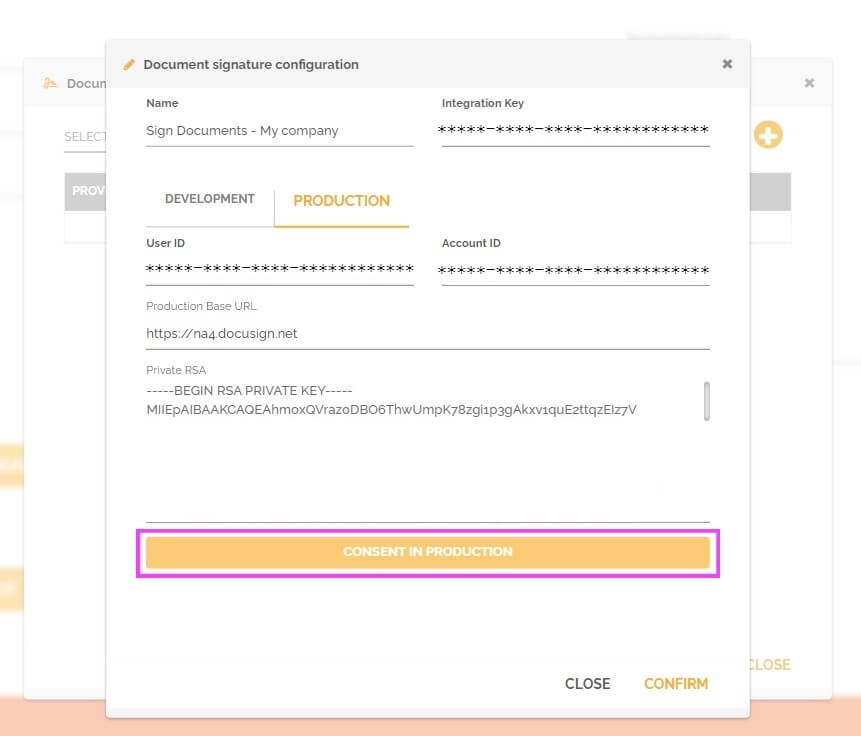
- Click confirm to finish creating your DocuSign account integration.

Set up your DocuSign account
- Create or log in to your DocuSign account: https://account.docusign.com/
- Go to the “Settings” page.
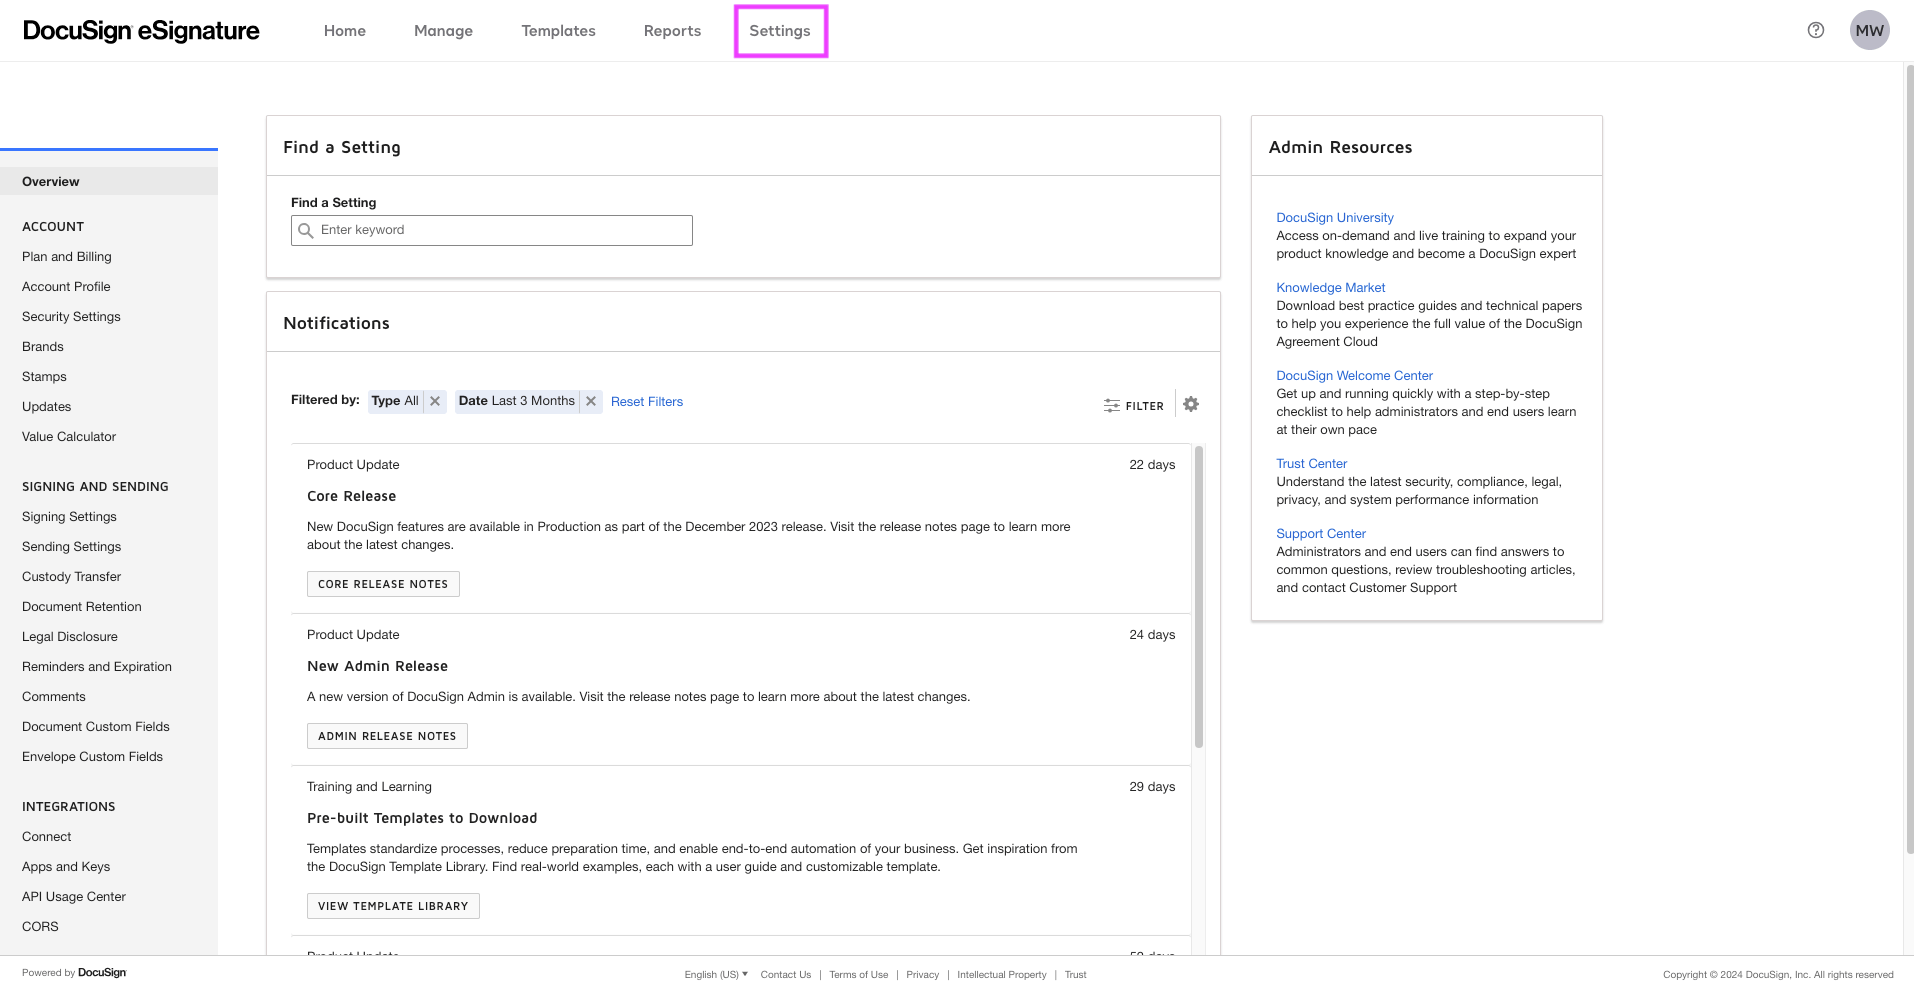
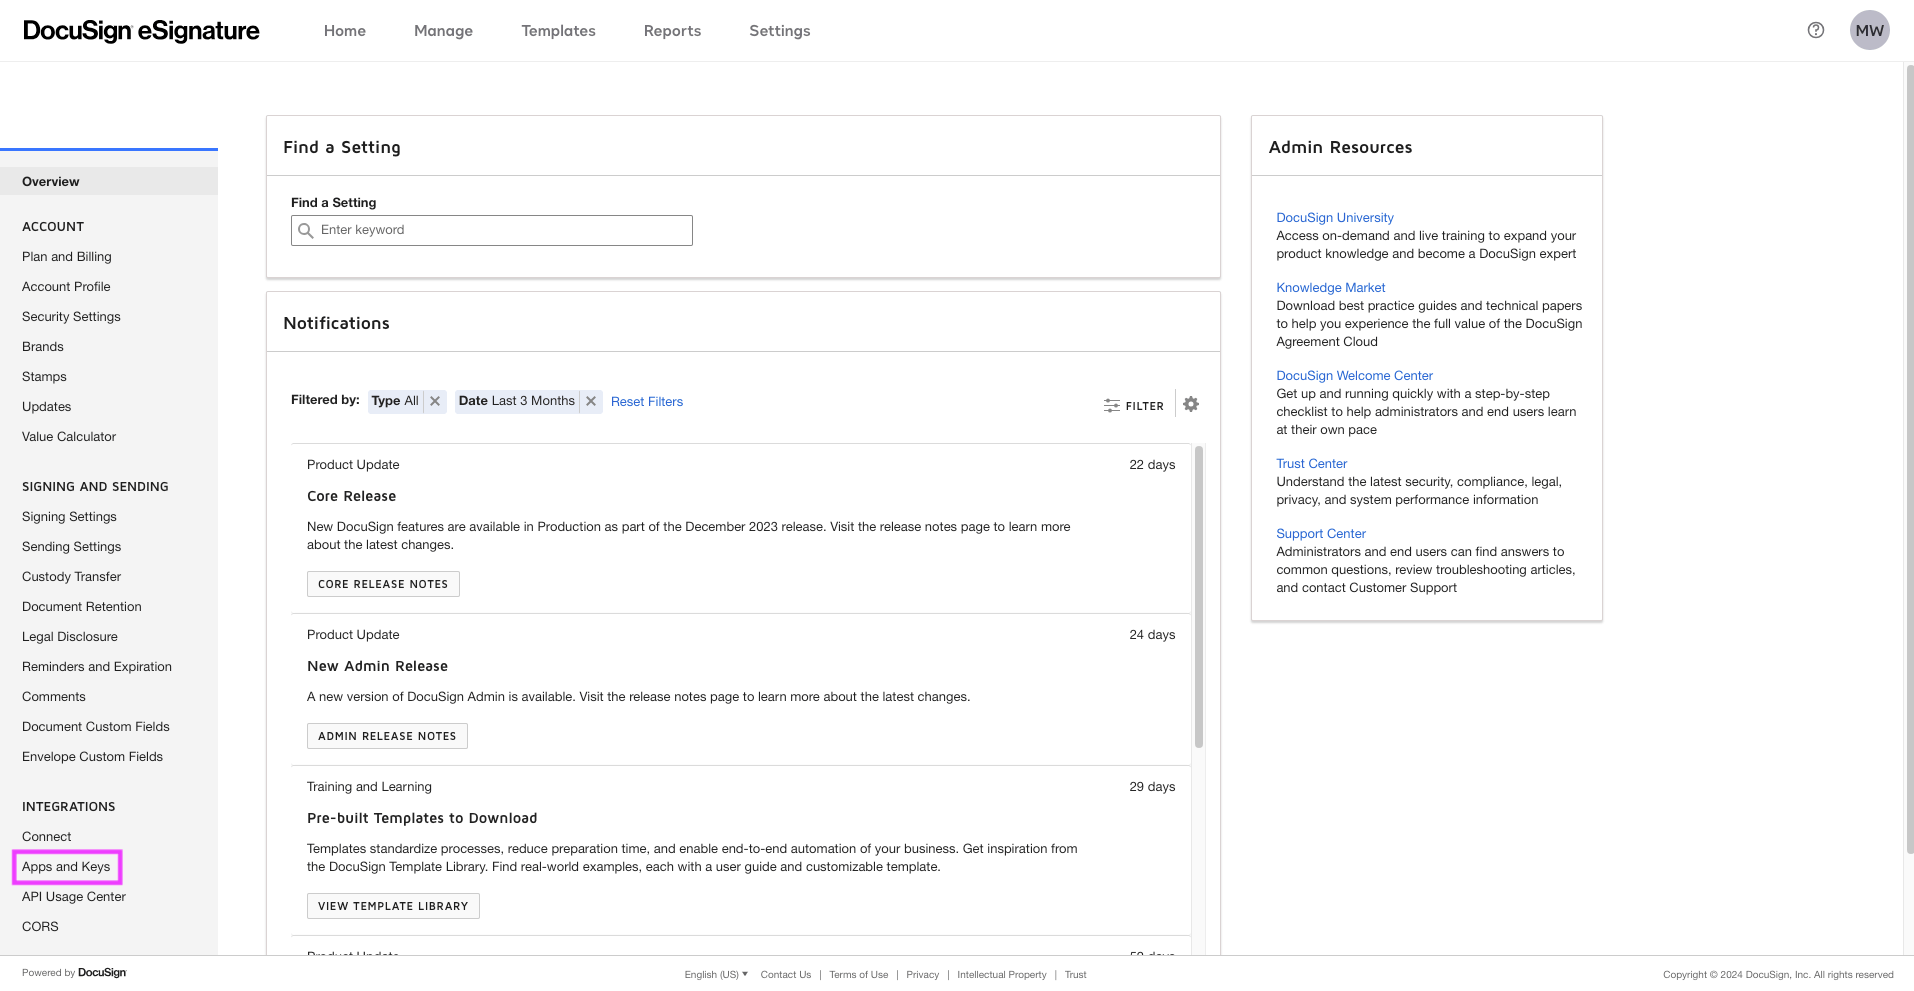
- Then go to the “Integrations” part and click on “App and Keys”.
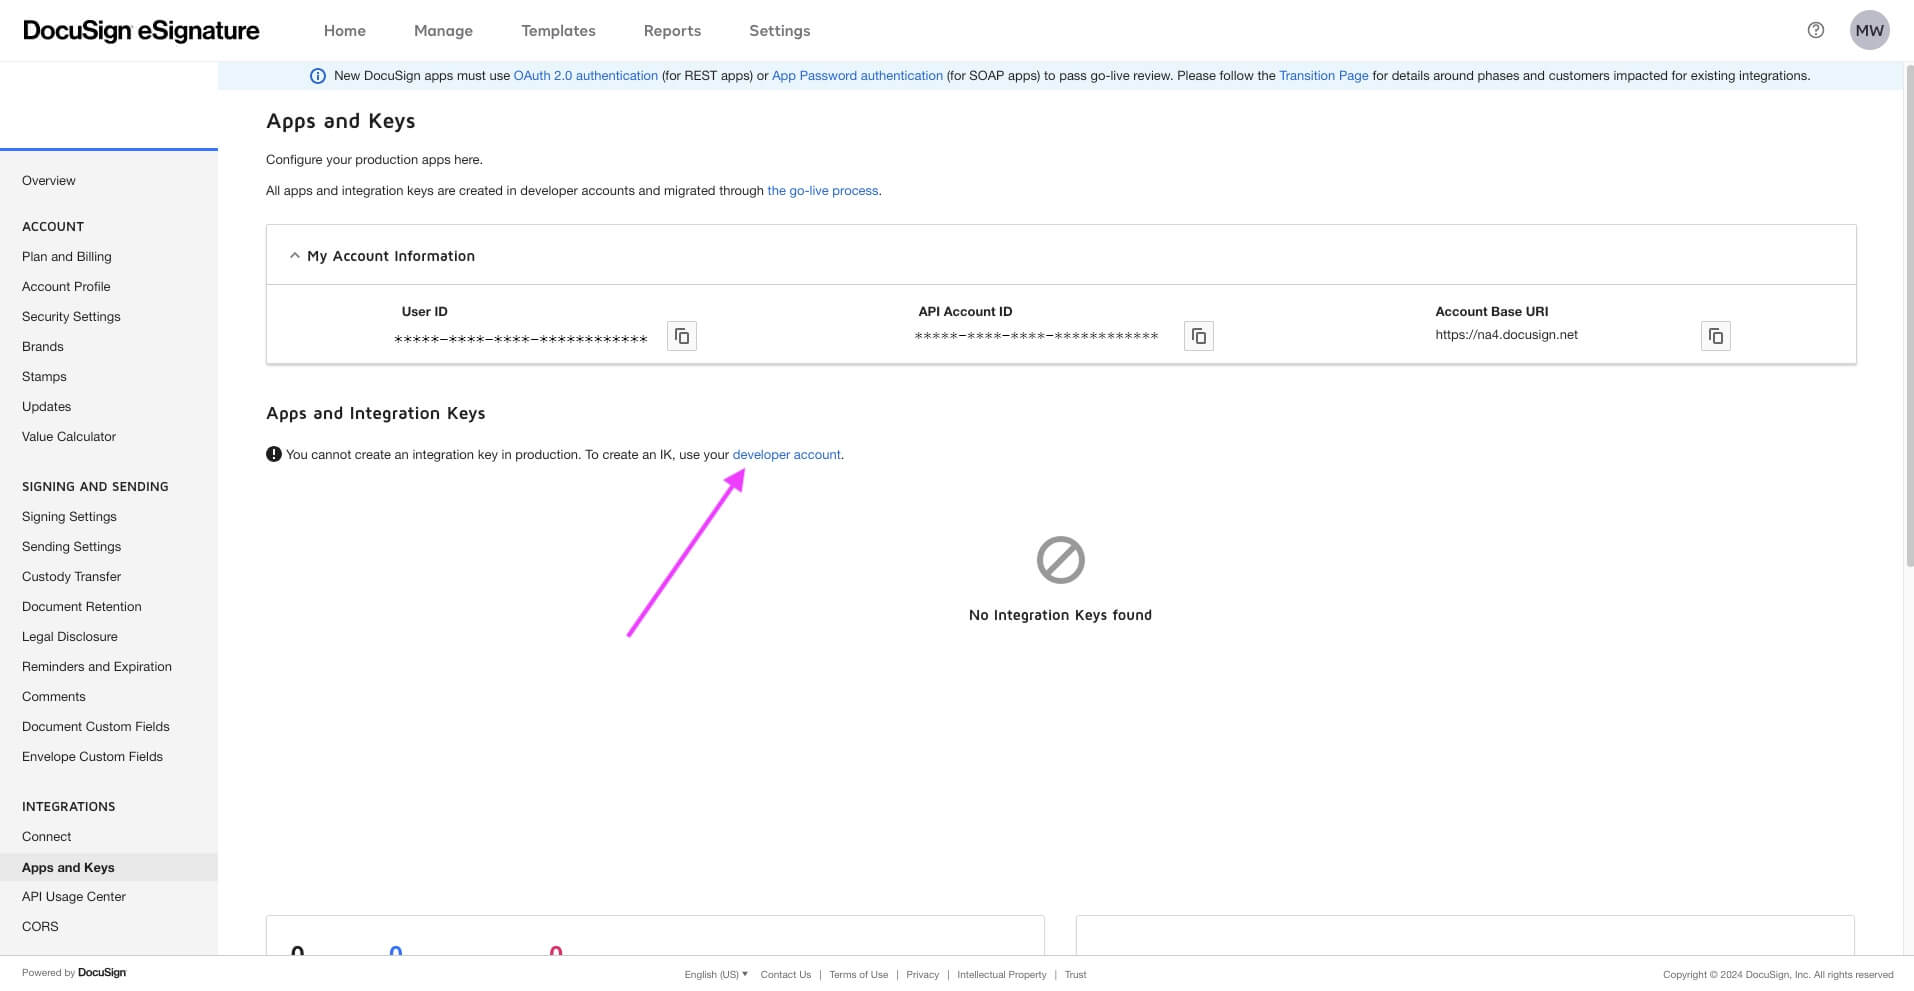
- Create or log in to the developer account by clicking on the link: “Developer account”.
These accounts are separate, which means that the templates, documents, envelopes, etc. that you create in the developer account will not be in the production account.For information: All test work items opened in the process editor will be created in the developer account and those created in production after the automation is published will be created in the production account.The production account has a limit of envelopes sent per month depending on the plan chosen. The development account has no limit.
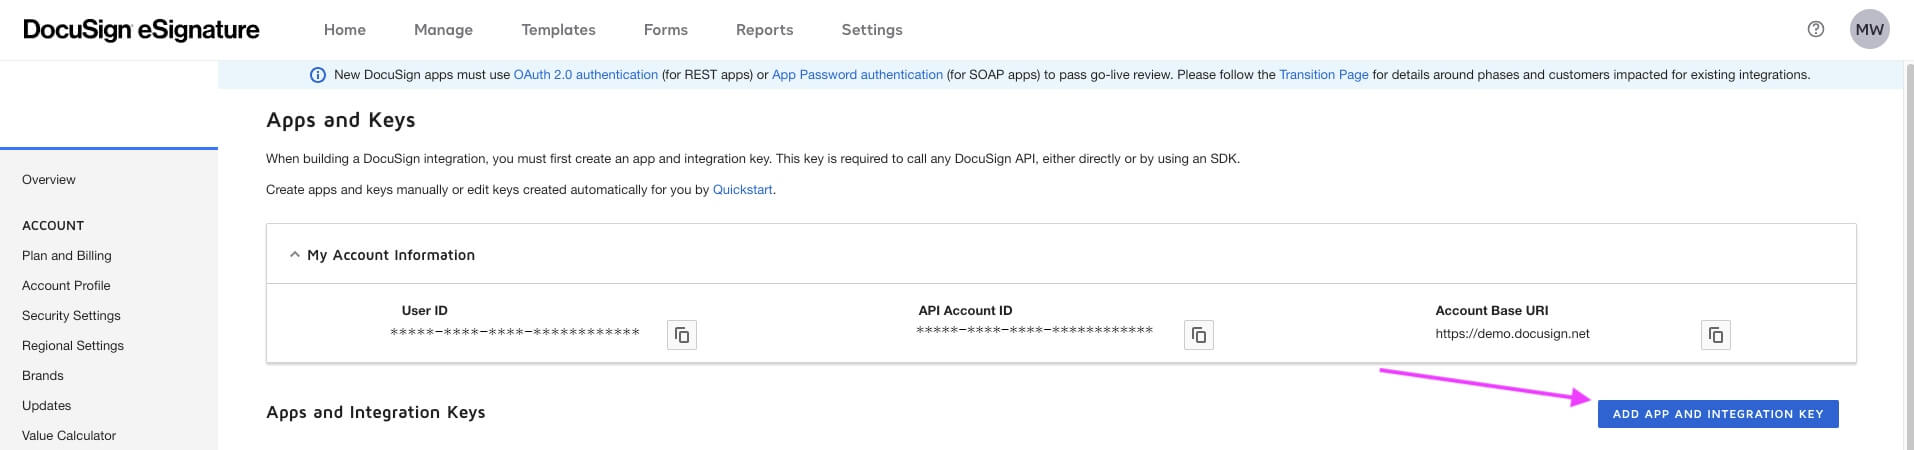
- Once in your developer account: https://developers.docusign.com/platform/account/, click on your avatar and then on “My Apps & Keys”.

- Click “Add app and integration key” to create a connector point to integration with HEFLO.
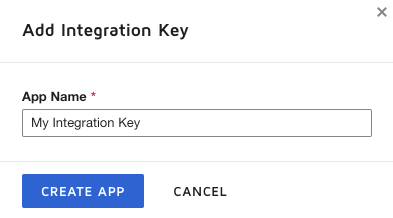
- Give it a name and click “Create app”. (This name will appear when the user consents to the integration of the application on HEFLO).
- You will get the necessary integration key for setting up the integration on HEFLO. Keep this information.
- Select “Yes” to the question: “Is your application able to securely store a secret client?”.
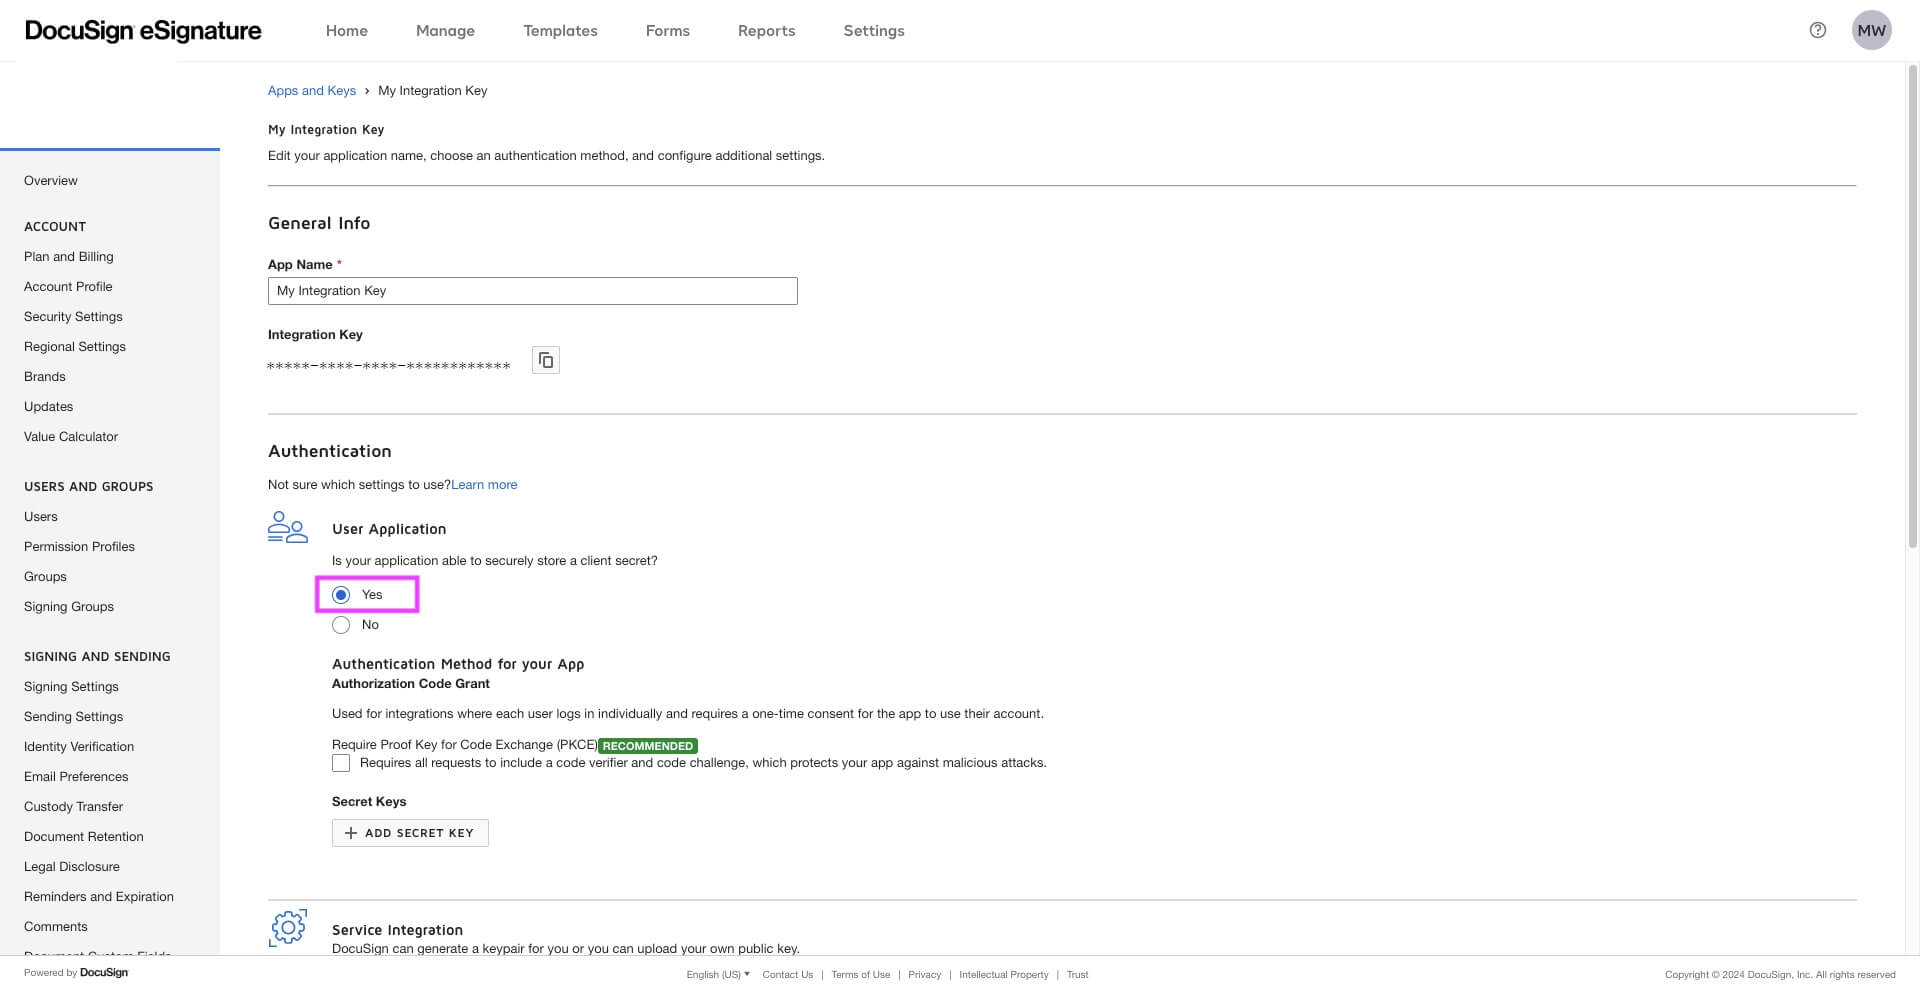
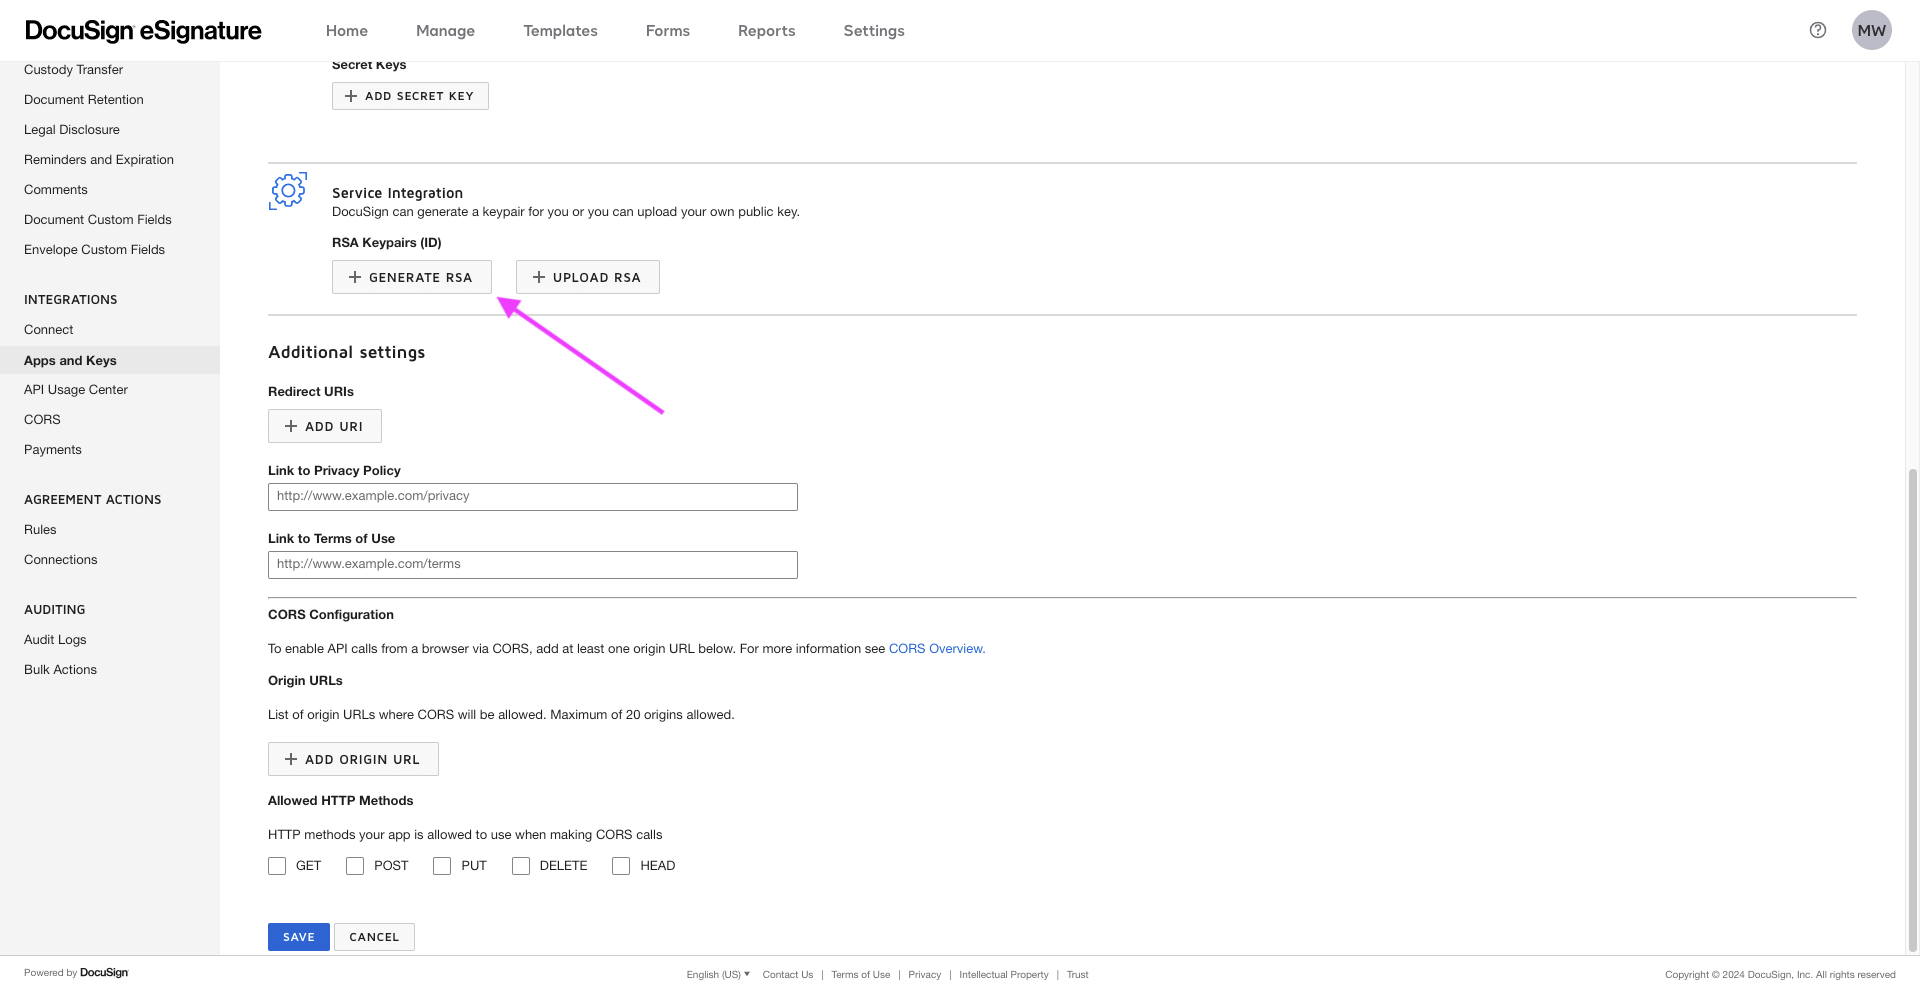
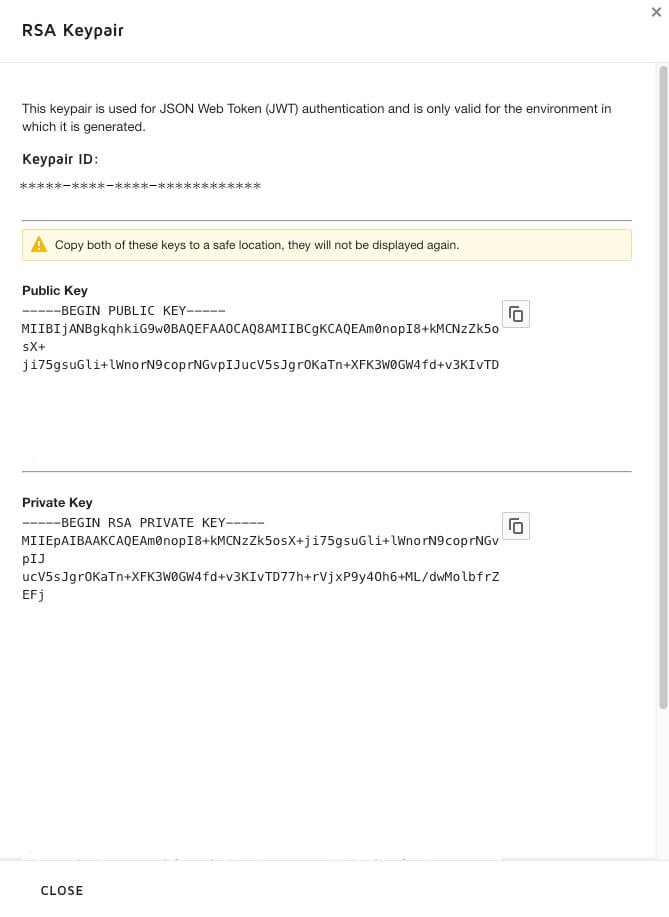
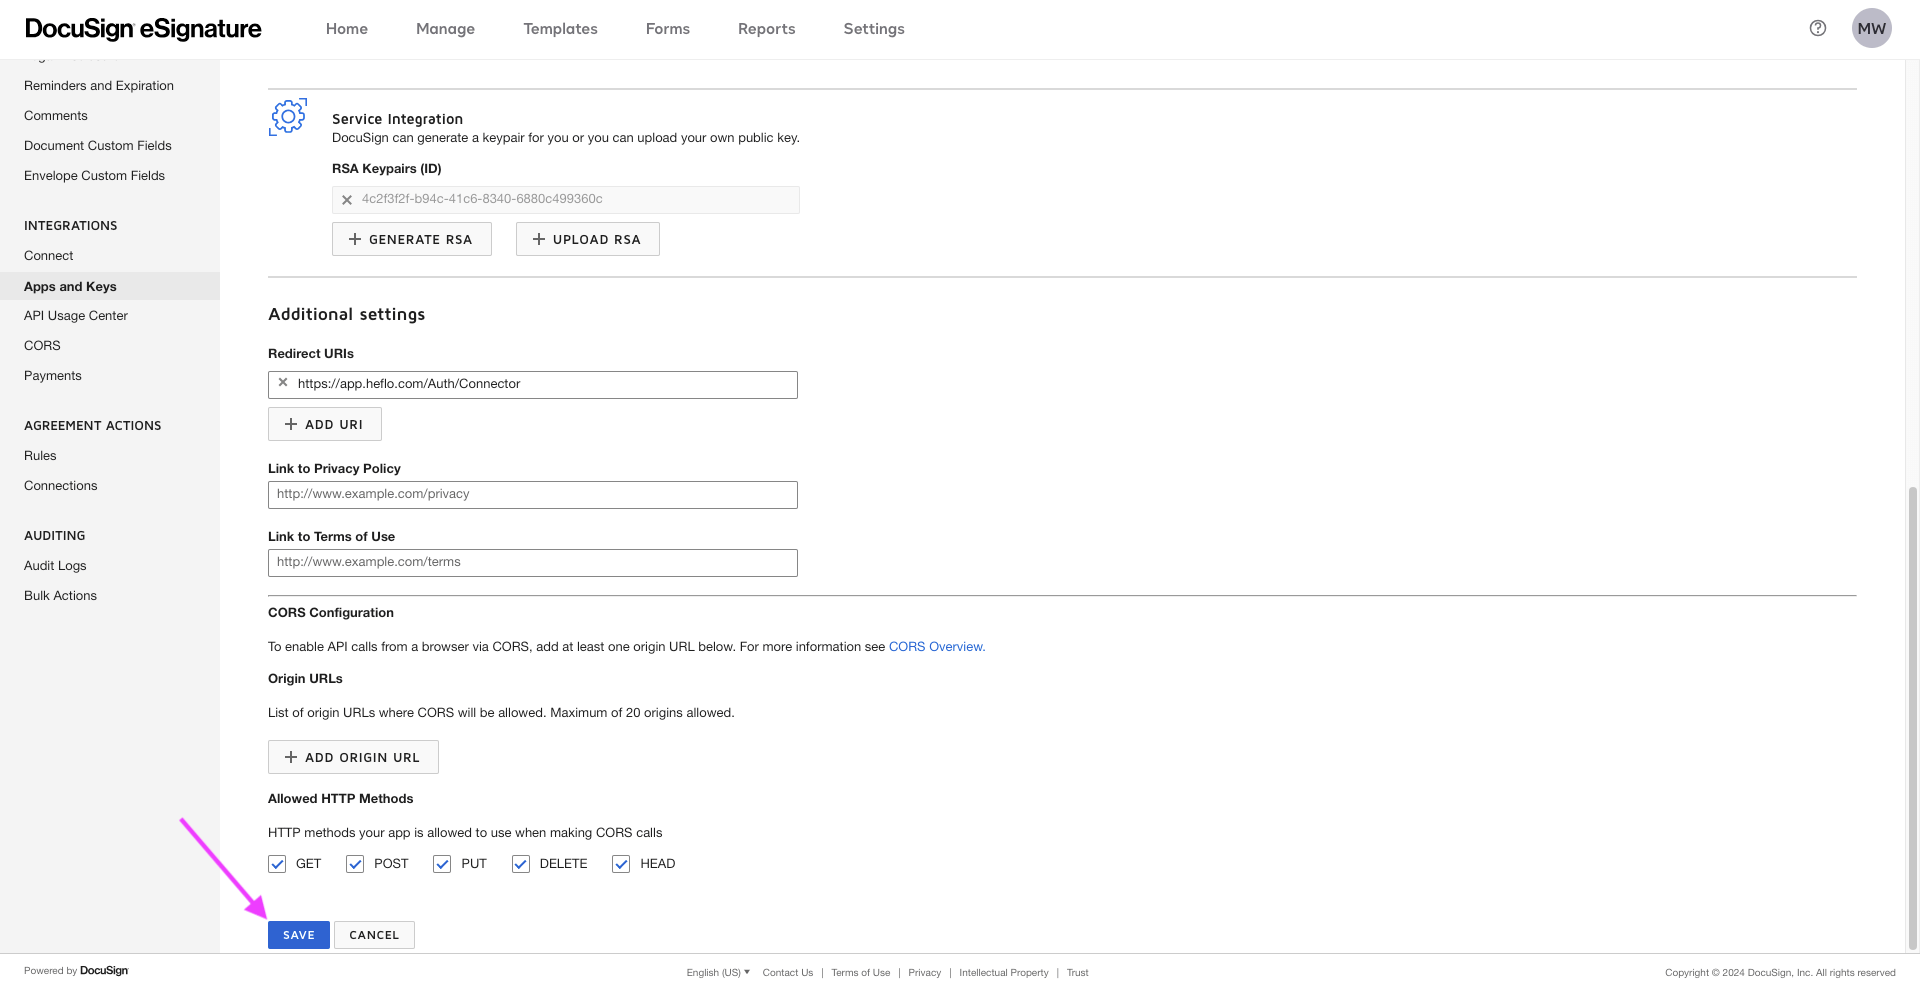
- Click on “+ Generate RSA”, keep this information. You will need to enter this in the “Private RSA” part of the “Development” and “Production” tab when configuring the DocuSign integration in your HEFLO environment.
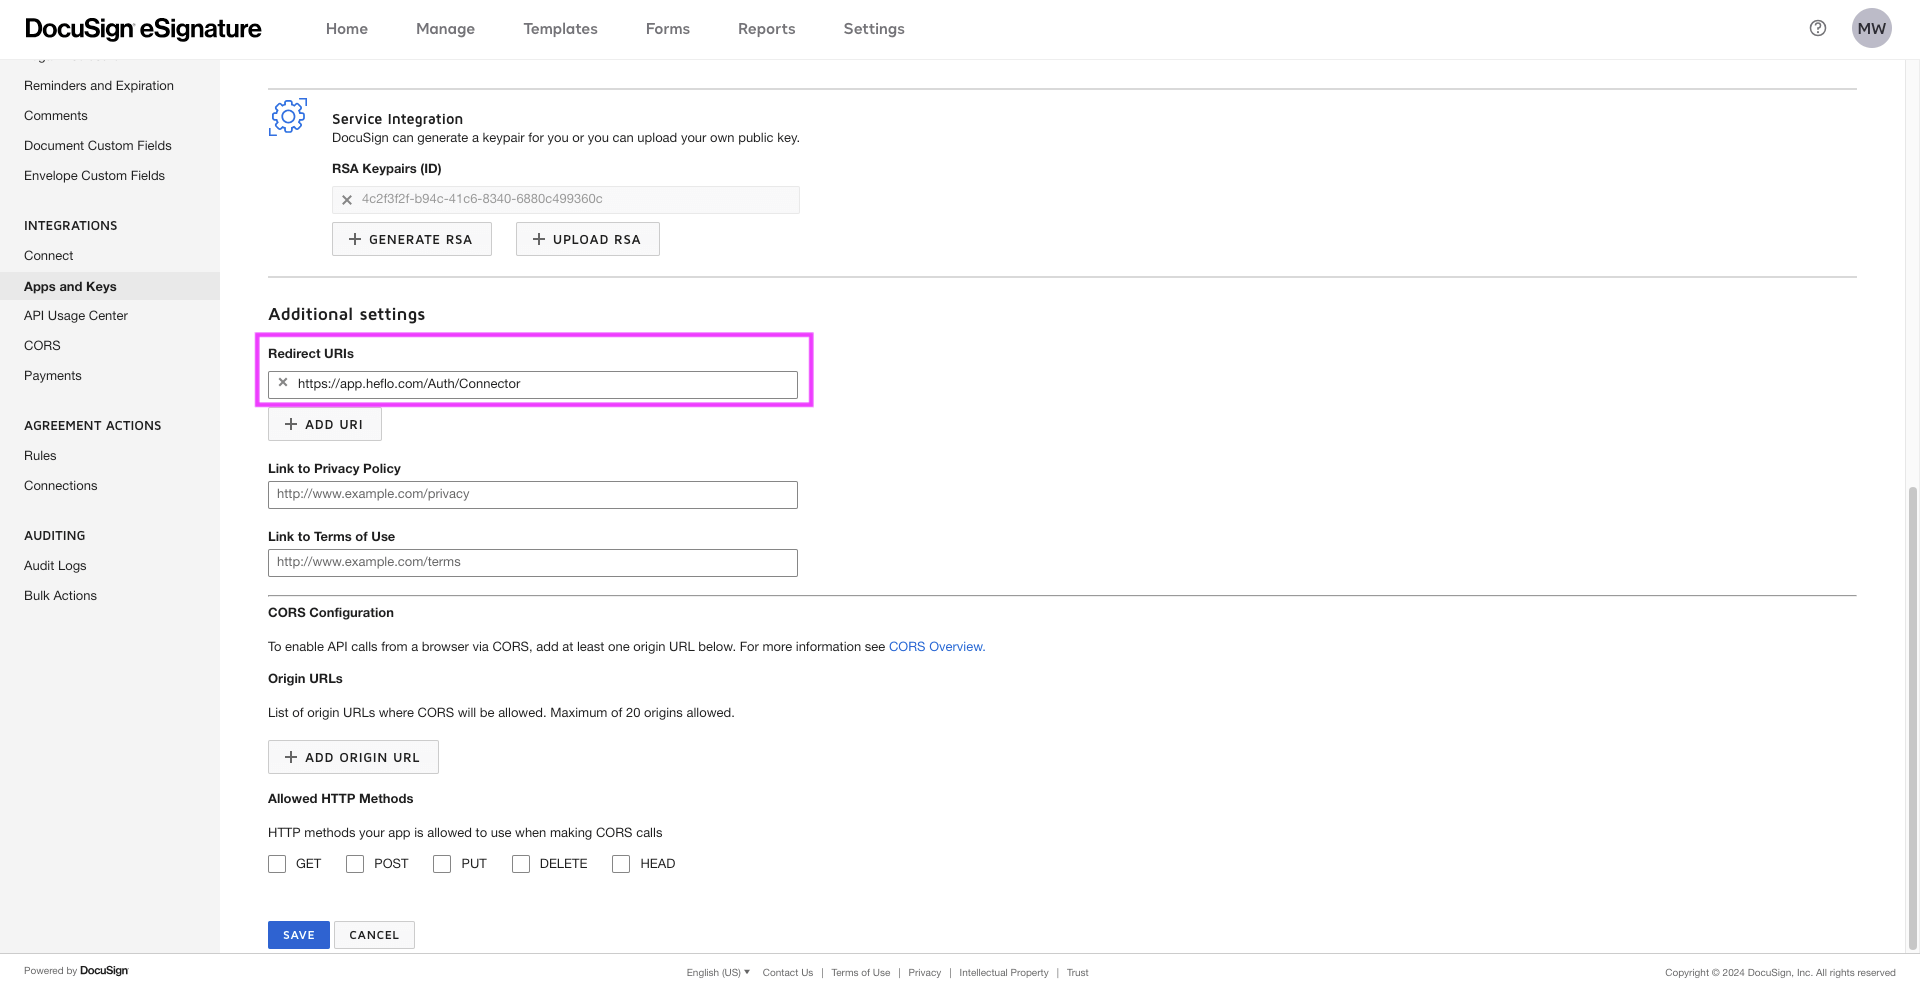
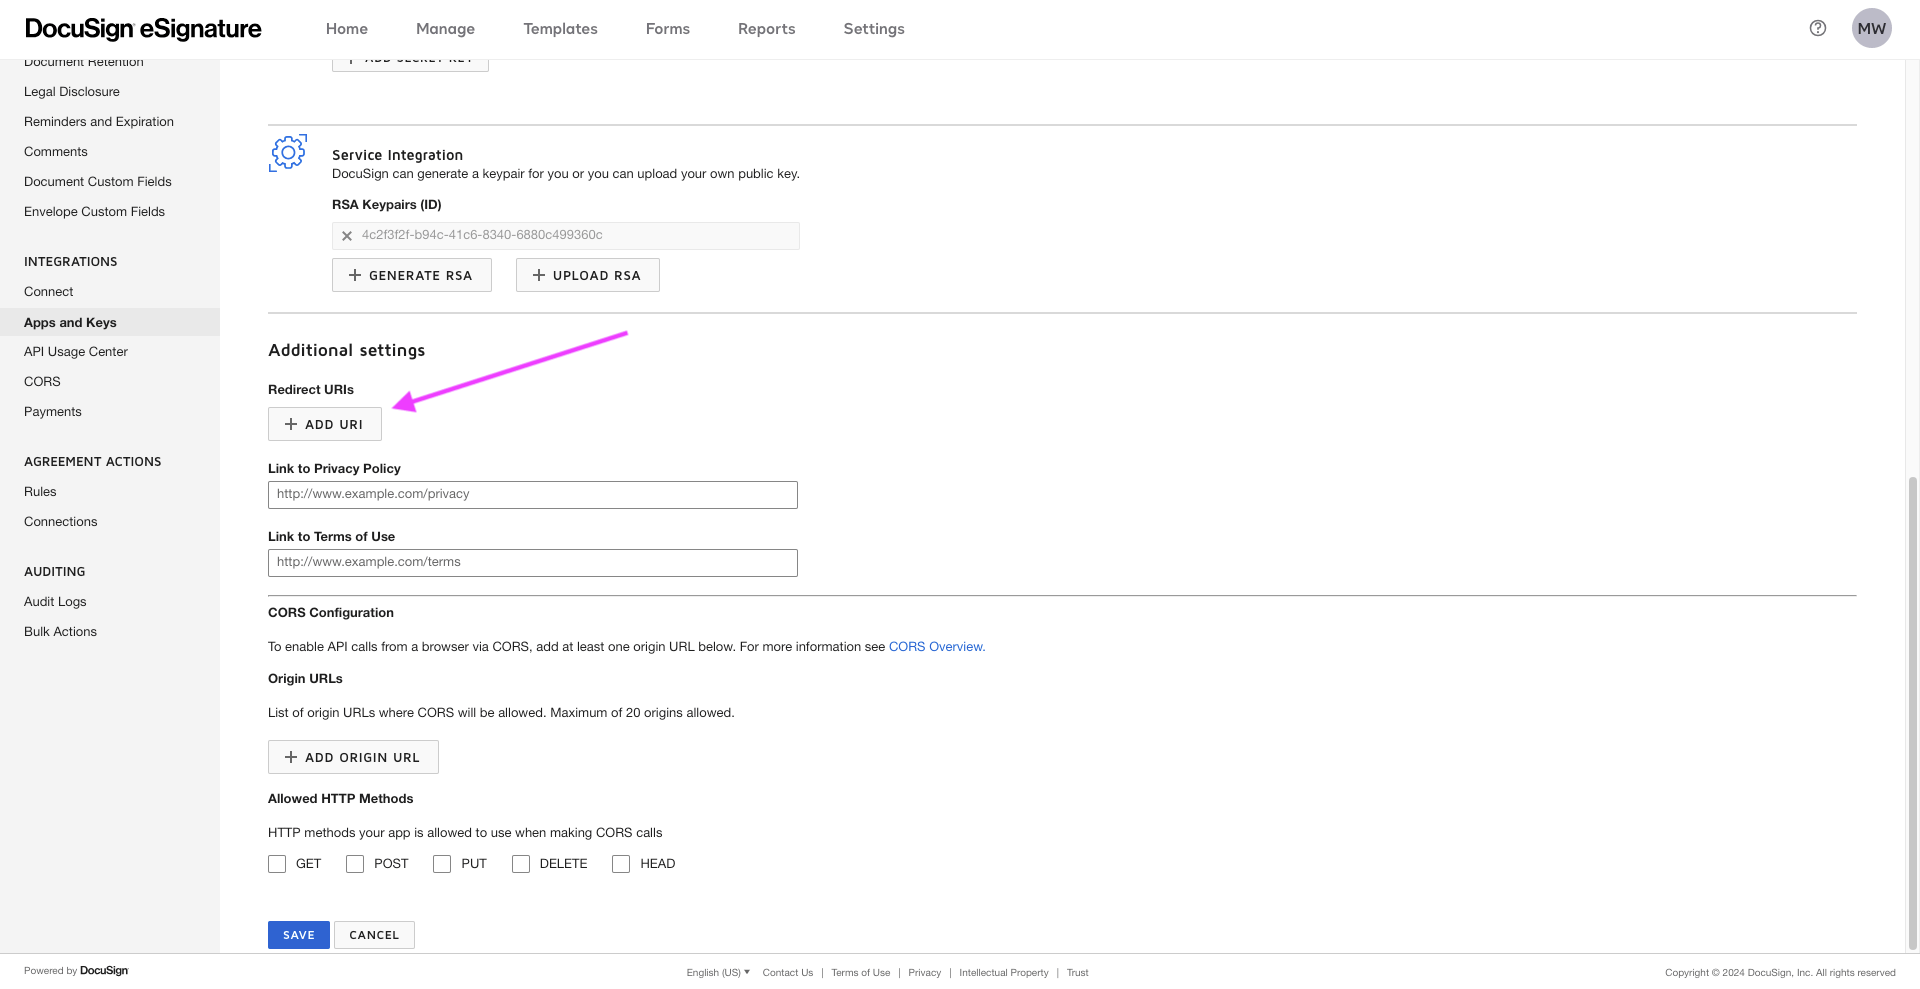
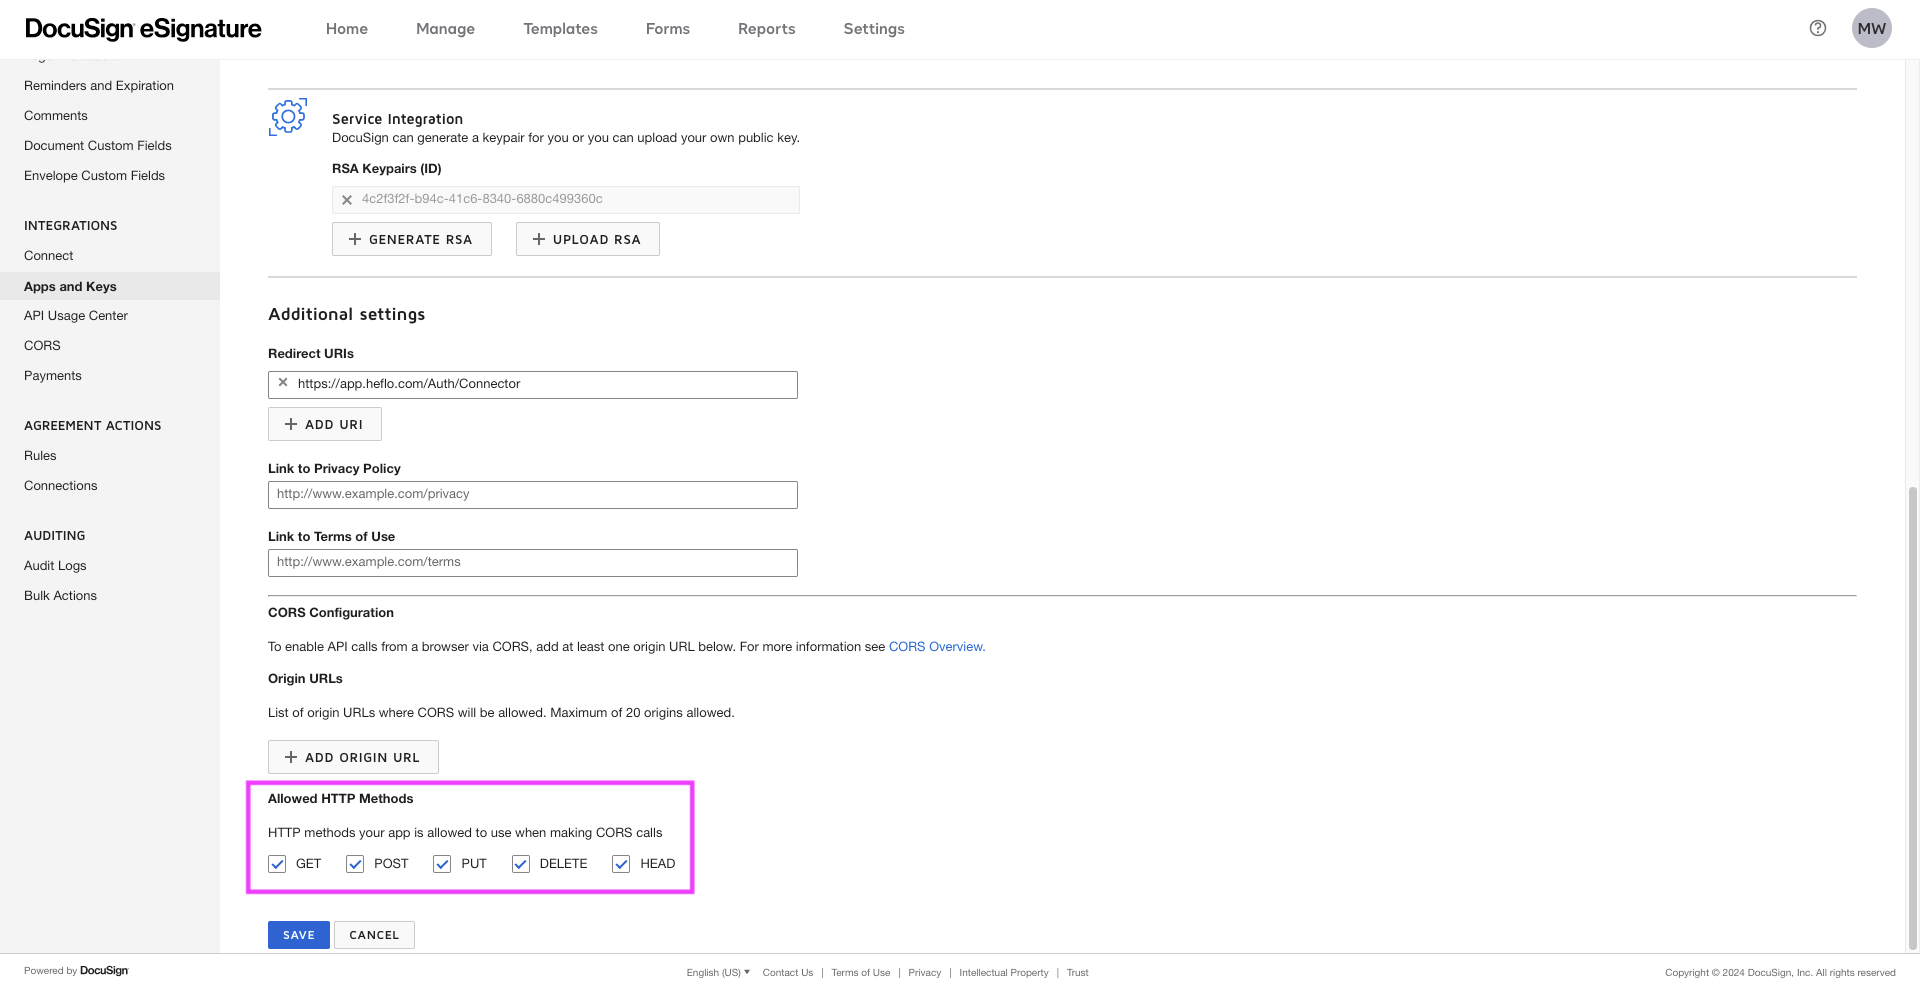
- Then click on “Add origin URL”, put this URL: https://app.heflo.com/Auth/Connector
- Then allow all HTTP methods.
- Click “Save” to create your application.
- Return to the “My Apps & Keys” page. You will then find the information necessary to integrate your DocuSign developer account into your HEFLO environment.
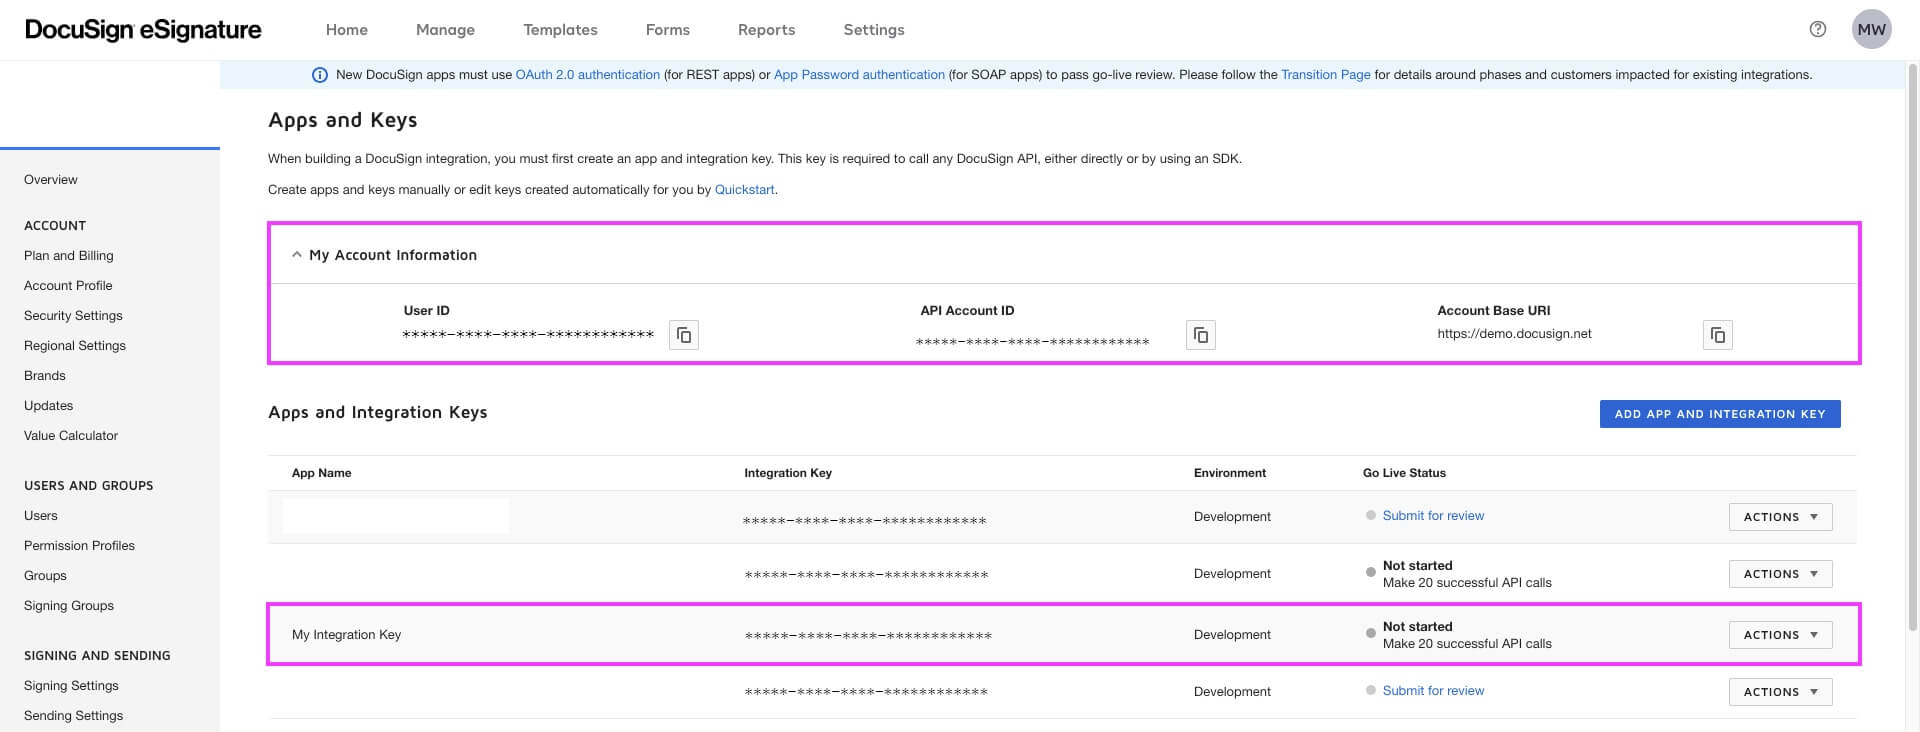
You must make 20 calls to your app from your developer account before you can create an app on your DocuSign account.
To configure the “Production” tab of the integration on HEFLO, you must return to your DocuSign account:https://account.docusign.com/
- Go to the “Integrations” section and click on “App and Keys”. You will then find the information to provide in the “Production” tab.

- You must put the same information in the “Integration key” and “Private RSA” sections as those entered in the “Development” tab.