
The Change Domain feature allows an administrator to update users’ email domains within a HEFLO environment.
This feature is useful when:
- The company changes its email domain (e.g., @company1.com to @company2.com)
- An email infrastructure migration is in progress
- A progressive migration needs to be performed by user groups
Once the modification is completed, users can log in again using their new email address.
🔐 Prerequisites
- You must be an environment administrator.
- The affected users must already exist in the environment.
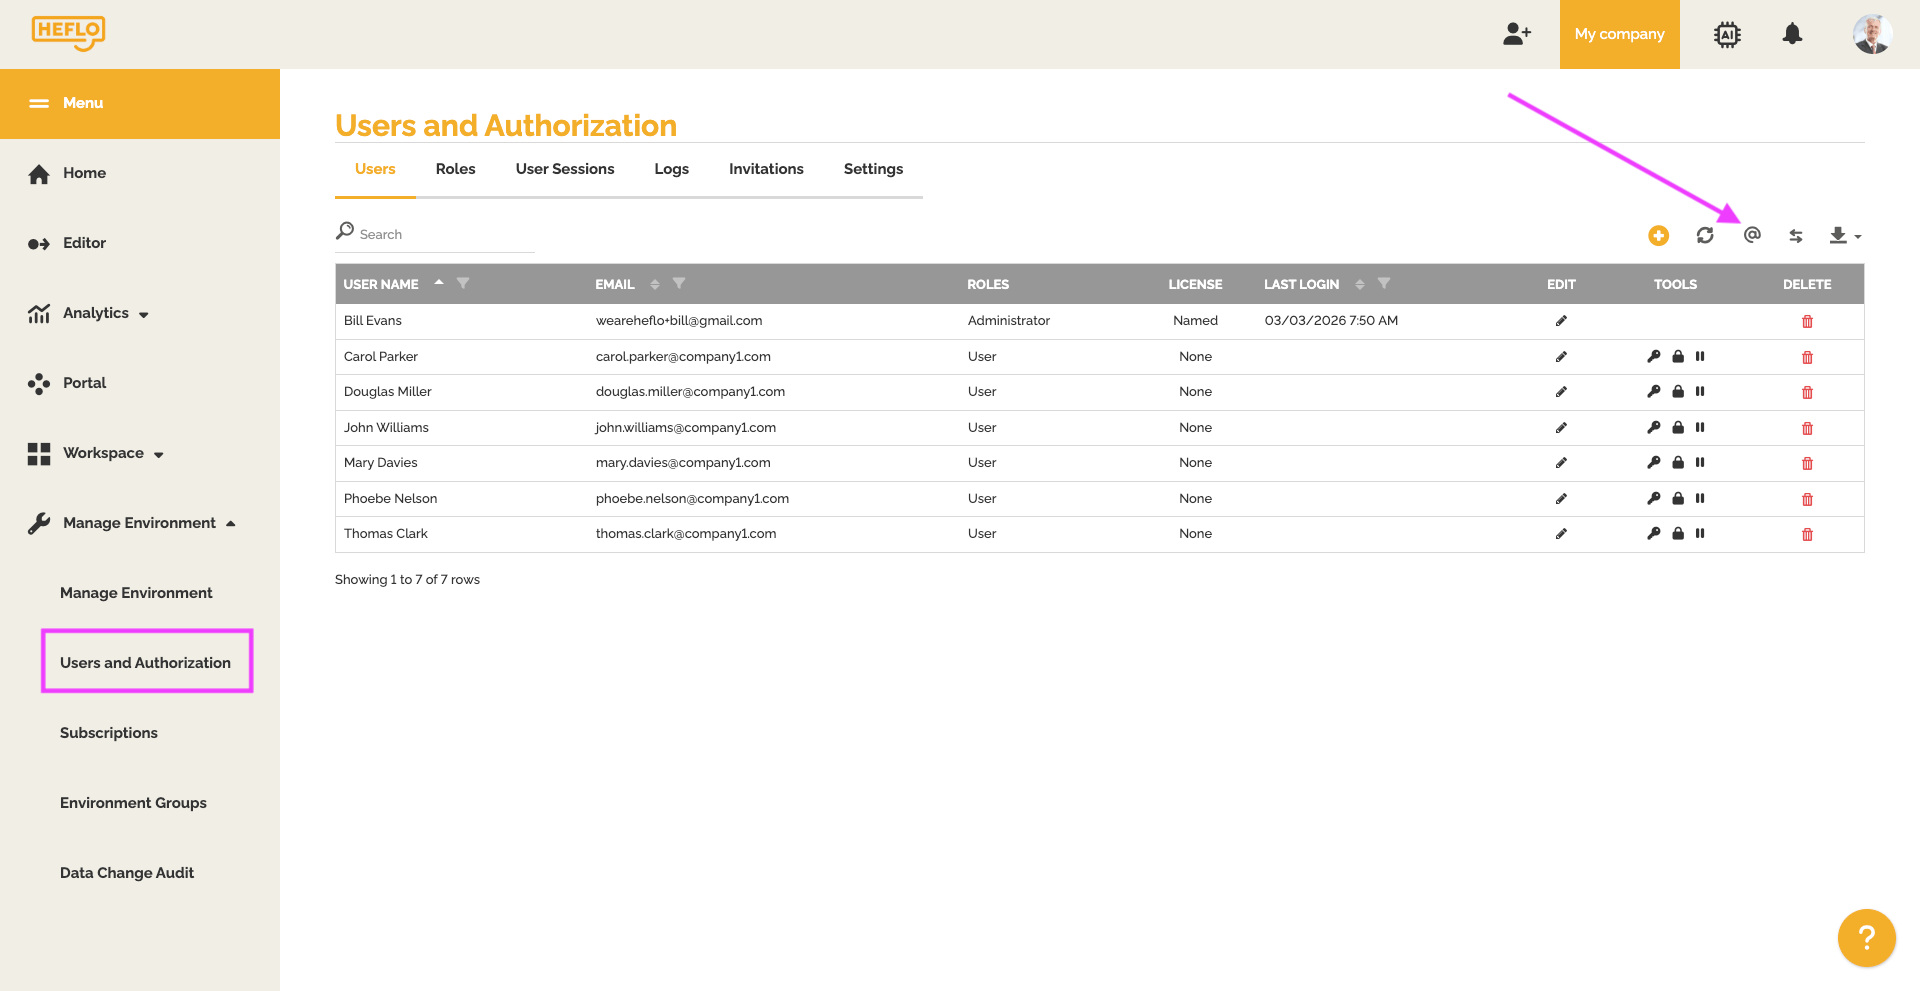
Accessing the Change Domain Feature
- Click Manage Environment.
- Go to the User Authorization page.
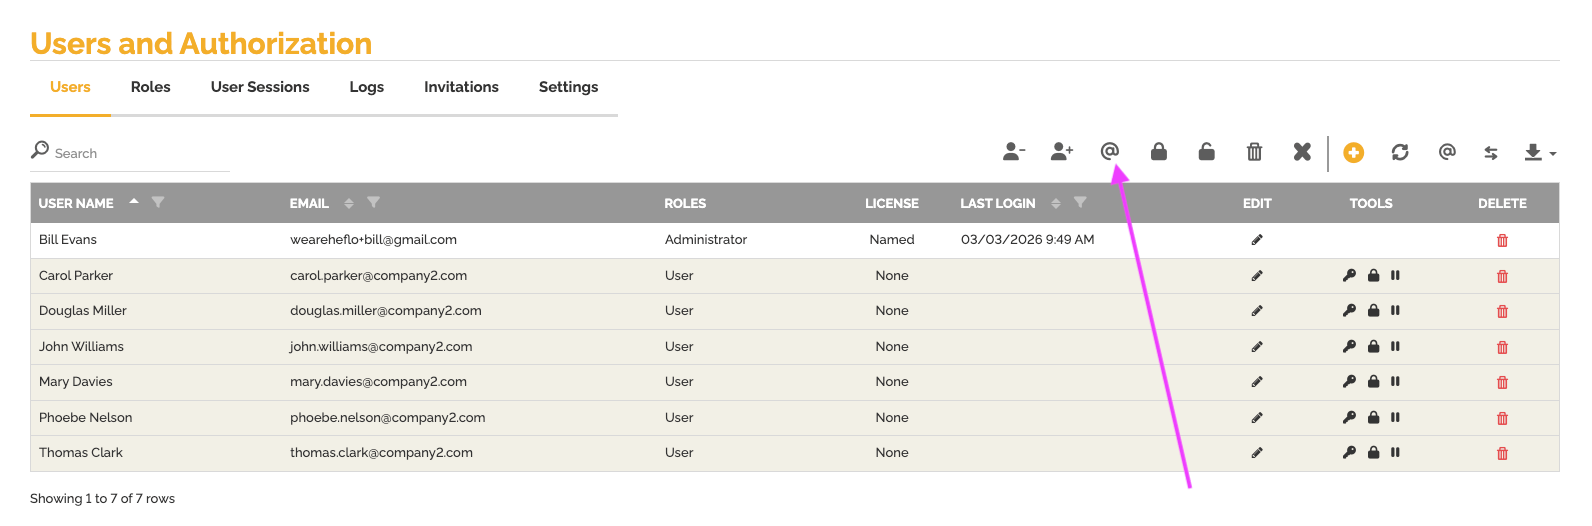
- Open the Users tab.
- At the top of the table, click the @ (Change Domain) icon.
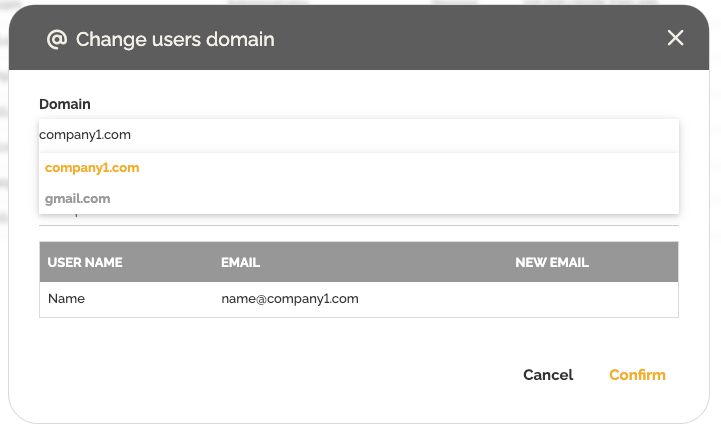
A window opens displaying:
- A combo box listing the available domains in the environment
- A field for entering the new domain
- A table summarizing the changes
Change the Domain for All Users of a Specific Domain
This method allows you to migrate all users who use a specific domain.
Steps
- In the Change Domain window, select the current domain you want to modify.
By default, the first domain in alphabetical order is displayed.
- Define the new domain.
- A summary table will appear showing:
- The current email address
- The new email address
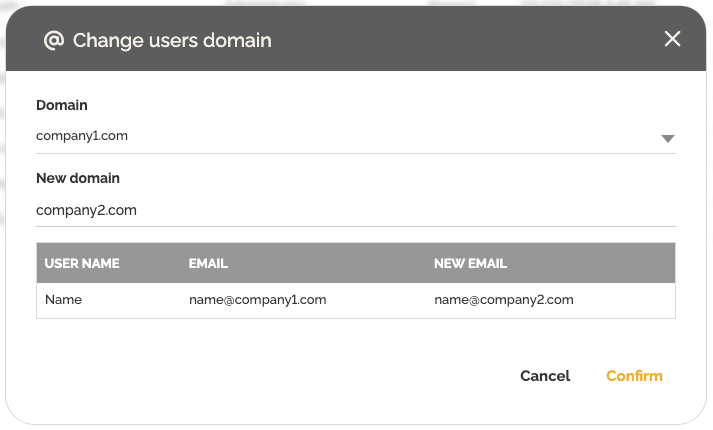
- Click Confirm.
- Type the required confirmation phrase and click Yes.
- A green confirmation notification (toast message) appears if the operation is successful.
The email addresses are updated immediately.
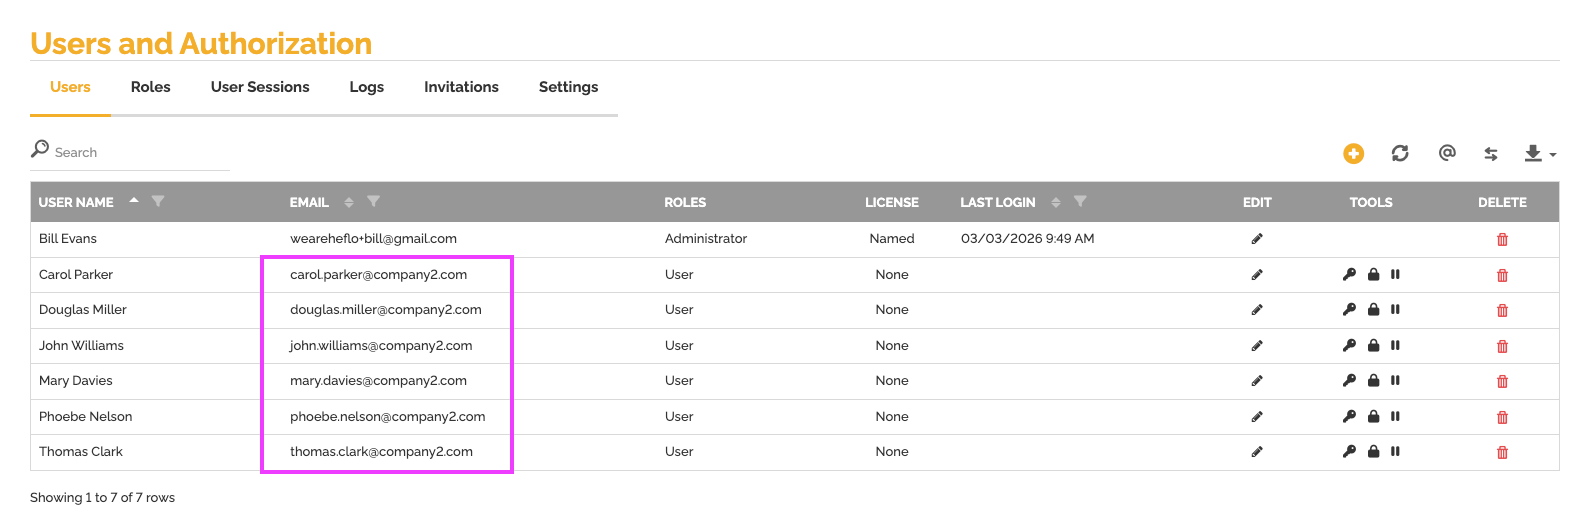
👉 Users can then log out and log in again using their new email address.
Note: This approach impacts only users within the target domain of the environment where the change is implemented.
Change the Domain for a Selected Group of Users
This method allows you to migrate specific users only.
Manual Selection
- In the Users tab, hold Ctrl.
- Click the users you want to select.
- The selected rows will be highlighted in gray.
💡 The selection is preserved even if you navigate between pages.
- Click the @ (Change Domain) icon.
- Review the list of selected users.
- Define the new domain.
- Click Confirm.
- Type the required confirmation phrase and click Yes.
Quick Multi-Selection (User Range)
- Hold Ctrl + Shift.
- Select the first user in the range.
- Select the last user in the desired range.
- Click the @ icon.
- Define the new domain.
- Click Confirm.
- Type the required confirmation phrase and click Yes.
Best Practices
- Inform users before performing the migration.
- Schedule the operation outside critical business hours.
- Ask users to log out after the update.
- Test with a small group of users first if needed.
Conclusion
The Change Domain feature enables:
- Bulk updates of a specific email domain
- Progressive migration by user selection
- Secure validation before applying changes
It simplifies organizational changes while ensuring control and security of user data.