
Automating a business process means making it executable. This means that people that take part on it will have tools that will guarantee its correct execution, productivity, and transparency. These are requirements to promote business process improvement.
In this tutorial, we are going to introduce the most important aspects of automating a business process on HEFLO BPM. If you still don’t know BPMN modeling, check out the tutorial for business process modeling wit HEFLO BPM.
Step 1 – Creation of the process
To create a new process, please read the orientation in this article: How to create a business process
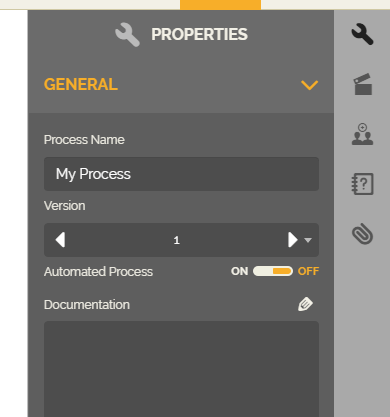
After creating the process, go to the properties tab and activate the switch “Automated Process”.
Step 2 – Defining responsibilities
To start setting responsibilities, you’ll need to add a pool element that defines the limits of the process. In more advanced implementations it is necessary to use multiple pools, but for our example, we’ll use a single one that shall represent the whole process.
- In the editor, locate the “Pool” element in the BPMN tool box.
- Inside the “Pool” item drag and drop the element named “Pool” to the process drawing area.
After adding the pool, we can include the lanes. Each lane will be configured to represent a performer that is responsible for a set of tasks. In our example, we’ll use the two lanes that were automatically added to the pool. If you find it necessary you can add more lanes by reading this article: How to add a lane to a pool.
- Select the first pool’s lane.
- Click on the wrench icon at the right side of the editor to open the properties tab.
- Locate the property “Performer” and click on the plus icon next to it.
- In the configuration dialog configure a name for your performer, keep the Resource Type as “People and groups” and then adjust the record list below. Confirm the editing.
The sample configuration above will create a performer that corresponds to your user. This means that your user will execute all tasks inside this lane. This has an impact on the process since every task inside this lane will be directed to the workspace of the performer previously configured.
As you can see the property “Resource type” from the performer configuration dialog also supports groups of people. These groups can be created by users with Administrator Access Level or generated automatically when a Department is configured. Now it’s a good time to adjust the performers and lanes in your process.
Step 3 – Including the process initiator
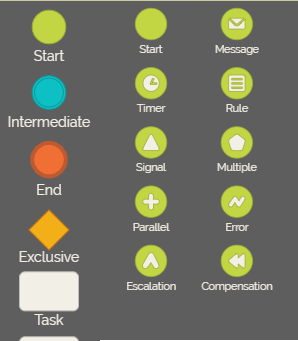
 The initiator is an element colored green that identifies the process start. Taking a closer look at the available options, we can note that there are many ways to start a process.
Each initiator has a particular icon that represents its trigger. There should be an initiator named “Start,” this is an initiator used to initiate the process manually. It is the most common initiator, and we are going to use it in this example.
- In the editor, locate the “Start” icon in the BPMN Tool box.
- Inside the “Start” drag and drop the element named “Start” to the lane that represents the performer that will initiate the process.
The other most used initiators are timers and message receivers. You can include as many initiators as you want, but it is vital that you only add a single generic initiator to your business process.
Step 4 – Adding tasks and gateways
Now you will need to add tasks, gateways and intermediate events to describe your business process. The most common elements are:
Generic Task
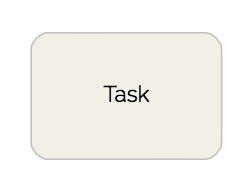
The generic task is the one that does not have any icons in it. It describes work done by someone or some system. In automated processes, it is common to add a data input form to the task. It is important to plan the forms correctly since later tasks in the process might depend on information inputted before them.
A task can be added to the business process thought the BPMN tool box just like the initiator was. You can also add the task using the shortcut icons that are displayed when a previous element to it is selected, in this case, the initiator:
- Select the business process initiator.
- Click on the tasks shortcut icon and drag it to the place where you wish to include it. Probably inside the same lane.
Note that after this procedure we have not only the tasks but also the flow element connecting both elements.
To include the input form follow these steps:
- Select the tasks where the input form is to be included.
- Click on the form shortcut icon next to the task, then drag and drop it.
- Select the “Data Input” element and click on the clipboard shortcut icon to display the form editor.
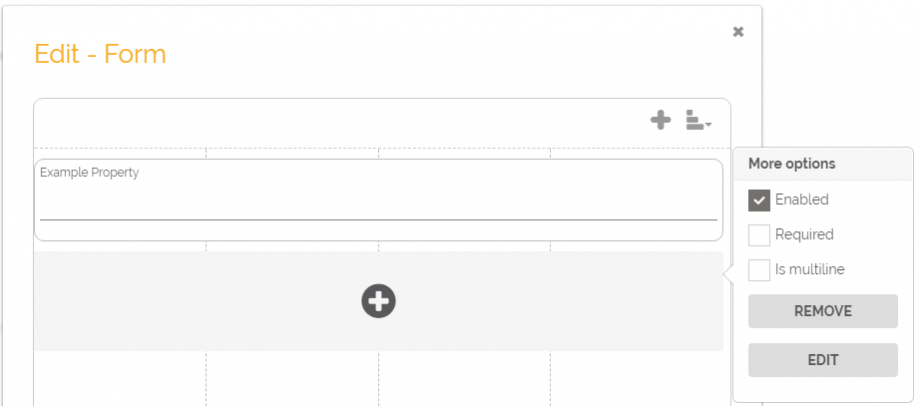
In the form editor, it is possible to add a property created previously, use an already existing one, or create a new one. To include a new property click on the plus icon and then select an existing property. You can also create a new one with the following procedure:
- In the “New Property” popup fill the name and type properties. It may be necessary to fill others properties depending on the kind of property.
- After filling the necessary properties, please click on “Confirm,” the new field should be added to the input form.
It may still be necessary to adjust some a few things, to do so just select the property and then edit the options displayed to the right of it. These available options depend on the property type. (A text property, for instance, will show the “Multi-line” option).
Exclusive gateway

Gateways are used to represent a flow deviation that is based on a property or user input. The most common one is the “Exclusive Gateway”, it is the one with an X symbol in it. In some other modeling tools, this gateway may be presented without any symbol in it.
When a process instance goes through an exclusive gateway it will follow only one of the possible paths. That’s why it is named “exclusive“.
Other common gateways include:
- Parallel Gateway: while using this gateway the process instance will be divided into many and they all need to be synchronized at the end.
- Inclusive Gateway: This gateway allows for dividing the process instance into many, but it differs from the parallel gateway by having a condition for each flow sequence.
To include the gateway follow the same procedure as was used for the initiator and for the task addition. If you want to change a gateway type, select it and click on the double arrowed icon.
Step 5 – Add the end of the process.

We’re almost done! Now we need to add an end element. We’ll use the generic (No symbols) end event. Add this element just like the others.
It is a good practice to add a text label to the end event that describes the final state of the process. For instance, a good text label for the end event of a hiring process would be “employee hired.”
Step 6 – Revision and validation

Please note that the validation procedure expects you to use the elements as it is described by the notation. It is impossible to automate a process that is not aligned to the notation.
To validate your process follow the steps:
- Click on the stamp icon at the top right of the screen.
- If everything is ok a success message should be displayed.
- If any problems were found a validation error will be displayed with the option to check out the details.
- If problems were found, please correct them and try step one again.
Step 7 – Testing the process
The next step is to test the business process execution. This can be done inside the editor and before the activation of the process. Here’s how to do so:
- Select the process initiator.
- Right click it and select “Tests -> start new work item.”
- The work item popup should be displayed. Follow every possible path of your process to ensure its quality.
If you’re still using a free account, you’ll be able to have 50 test work items. When you reach this limit, you’ll need to delete all work items to keep testing. To do so, follow the instructions in this video: Removing Work Items and Testing Process Automation
Step 8 – Publishing the automated business process
Everything is almost done! The last step is to publish your automated business process. After publishing your business process, you’ll not be able to edit it anymore, and it will be available in your HEFLO environment. It means that:
- If the process has a generic initiator, then users will be able to instantiate it from the Workspace page.
- If the process has a timer initiator, whenever the time configured in the element comes the process will be automatically instantiated.
- If the process has a message initiator configured, whenever a message is received a new process will be initiated.
To publish your process follow the steps:
- Access the actions tab. It should be available at the right side of the editor.
- Click on “Publish Automation”.
If everything is fine, then your process should be published!
Step 9 – Creating business process instances

Right now your process should be executable. To understand how the Workspace works, please watch the video on Execution of business process automation
How to improve the business process?
When a process is published, most of it will be blocked for edit. It happens because, from now on, people will be acting in its instances and we can’t change the process while it executes. It still is possible to adjust a few settings such as performers and data input forms. If you want to improve your process, please watch our video on Improvement cycle and version control